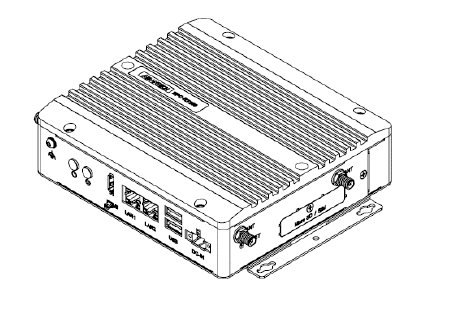
EPC-R7200 Ubuntu 18.04 User Guide
產品介紹(Product introduction )
產品特性(Product Features)
- NVIDIA Jetson Module Compatible: Jetson Xavier™ NX, Jetson™ TX2 NX and Jetson Nano™
- Fanless ultra-compact Barebones PC with thermal reference design
- AIM-Linux software service with peripheral driver integration supports NVIDIA JetPack SDK
- Accepts flexible application-oriented UIO40-Express I/O expansion cards
- Industrial and Rugged design supports wide operating temperatures, power input, and vibration tolerance
產品官網連結(Product official website link)
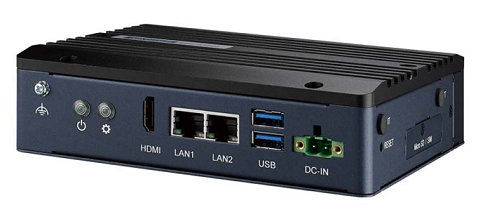
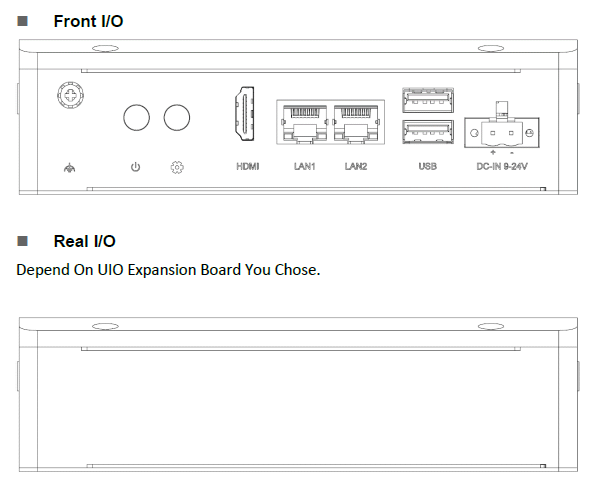
硬件接口說明(Hardware interface introduction)
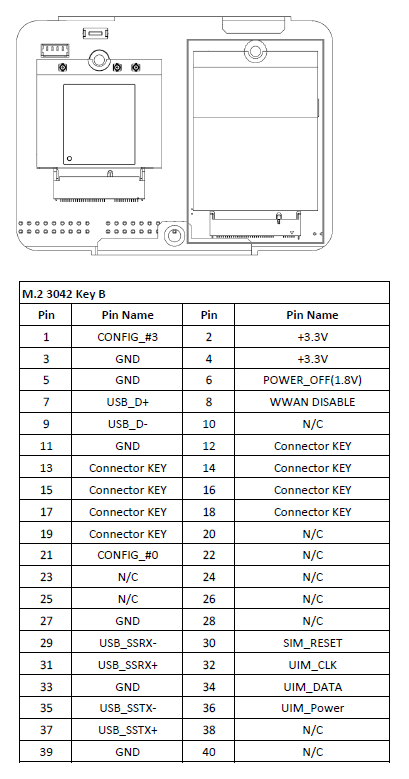
EPC-R7200 接口布局圖 Board Dimension Layout

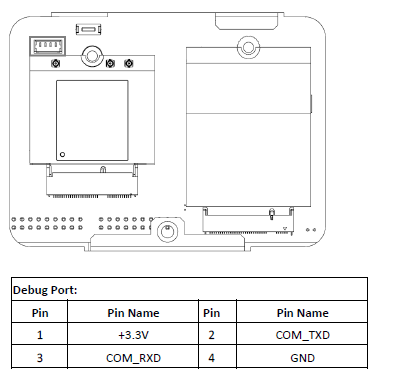
Debug Port
EPC-R7200 provides one Debug Port for development used. Debug cable P/N: 1700021565-01 4P-1.25 to D-SUB 9P (F) 60cm
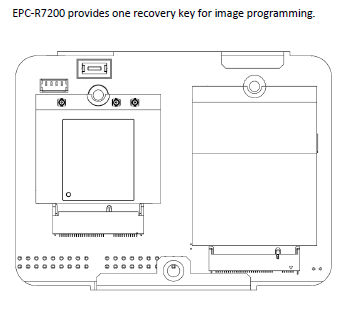
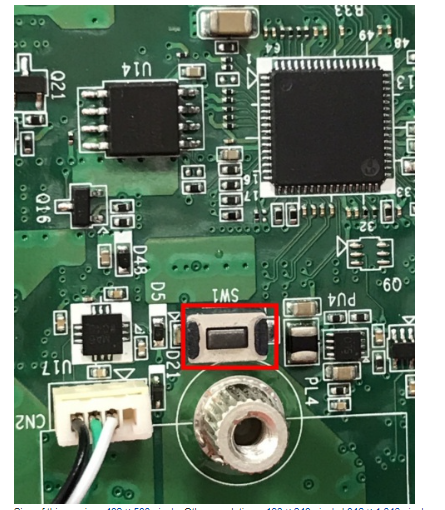
Recovery Key
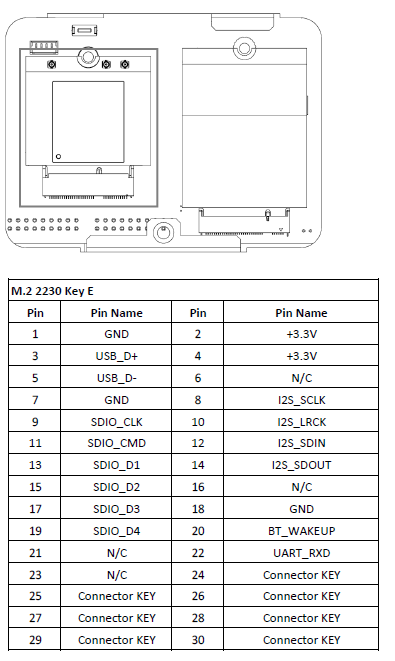
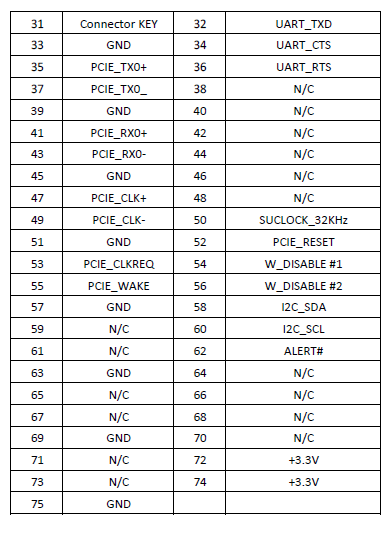
M.2 2230 Key E Slot
EPC-R7200 provides one M.2 2230 Key E Slot for WLAN card. P/N: EWM-W159M201E 802.11 ac/a/b/g/n + Bluetooth 5.0 M.2 2230 (A-E Key) Card
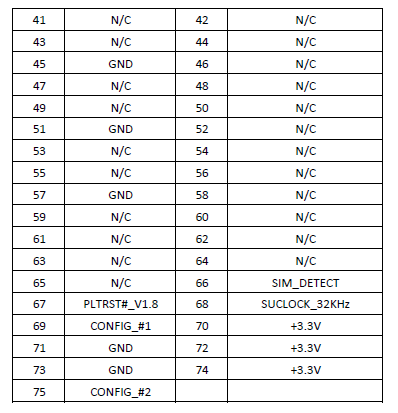
M.2 3042 Key B Slot
EPC-R7200 provides one M.2 3042 Key B Slot for WWAN card
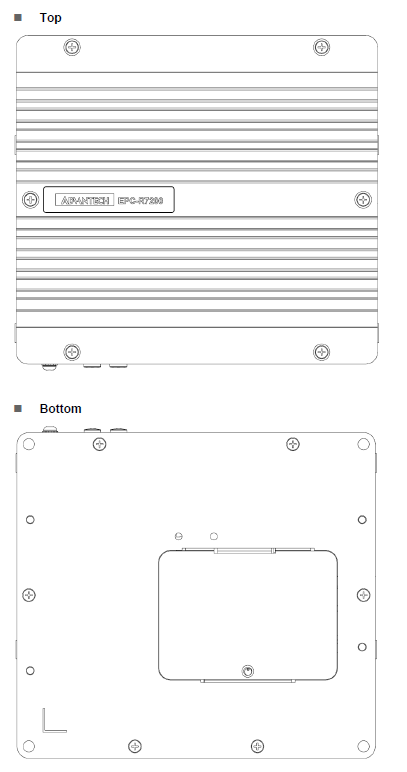
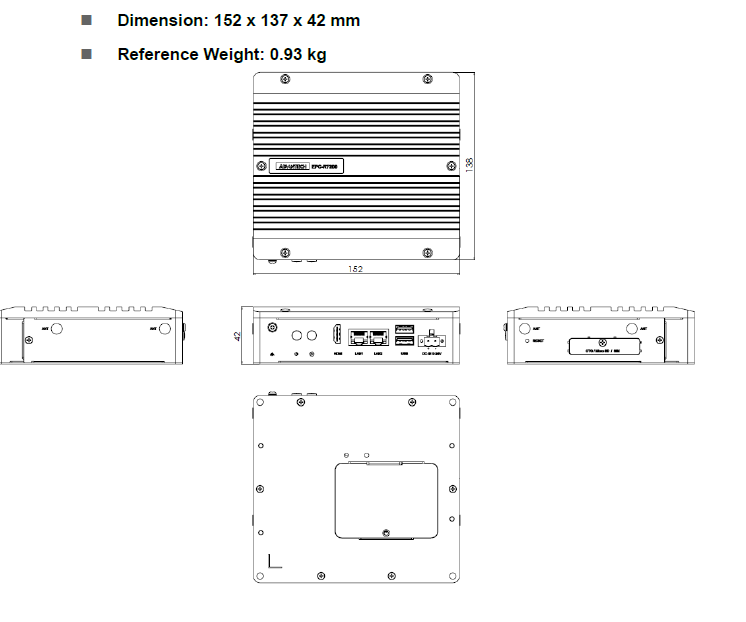
**机械尺寸 (**Mechanical Characteristics)
快速入门 (Quick Start)
系统下载 (OS Download)
- Linux系统 (Linux OS)
Linux 燒錄方法 (Linux Flash eMMC Method)
1.Prepare a Linux host system Ubuntu x64 v18.04. Download the image file and unzip the image.tar.gz file on Linux host PC.
    $ sudo tar zxvf EPC-R7200_Nano.tar.gz
    $ cd 210/
2.Enter to recovery mode by holding the recover button and plug power to boot. Release recover button around 3 seconds after plug in power.
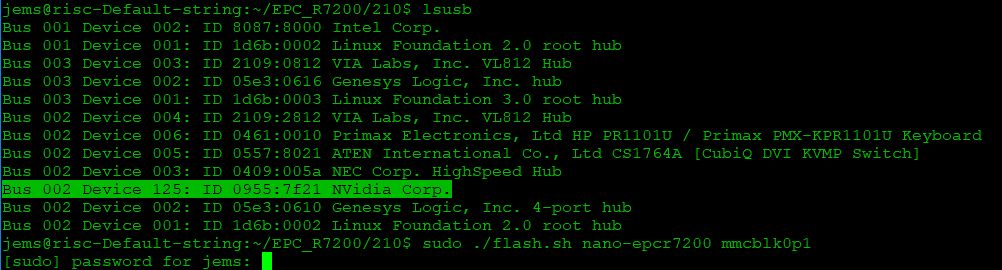
3.Connect Micro USB cable from EPC-R7200 Micro USB port to Linux host PC USB TypeA port. Check the device is in recovery mode by command “lsusb”. Will get NVidia Corp. with ID 0955:7f21
4.Execute command to flash imag:
@risc-Default-string:~/EPC_R7200/210$ sudo ./flash.sh nano-epcr7200 mmcblk0p1
Image name: Please download the correct image version with the name below.
Where
"-v : Image version" 00001~99999
"-s : 186 - Jetson TX2 NX"
"   : 194 - Jetson Xavier NX"
"   : 210 - Jetson Nano"
Update the flash command for DIV0003:

Note: For TX2-NX DIV0004(7200A1AIM20UIV00004_20230203.tar)
[root@linux Linux_for_Tegra]# cd bootloader/
[root@linux bootloader]# source flashcmd.txt
5.Wait around 10~15 minute to flash image to device:
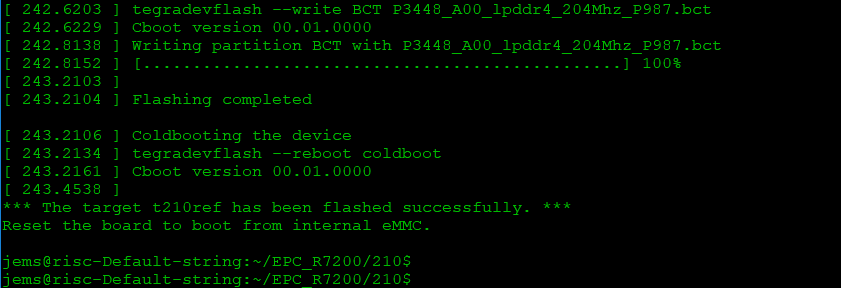
6.Check the device login to system:
login user: ubuntu/ubuntu
7.Check the eth1 can get the IP Addr:

Debug 串口調試 (Debug port Setting)
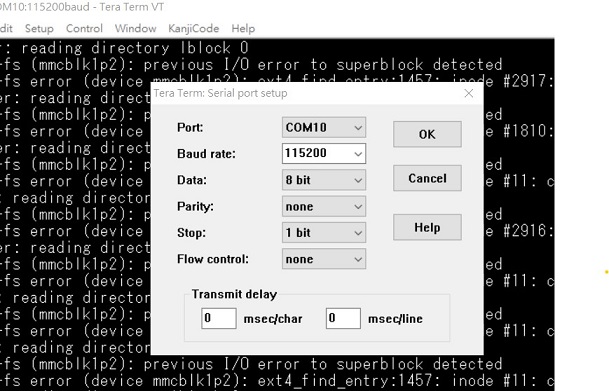
以 Tera Term 为例介绍如何使用串口调试功能
   Baud Rate波特率:115200
   Data 数据位:8
   Parity 奇偶校验:无
   Stop 停止位:1
   Flow Control流控:无
Tera Term Tool
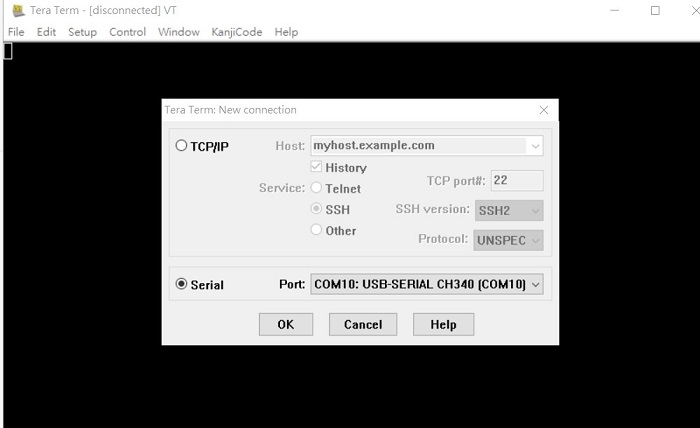
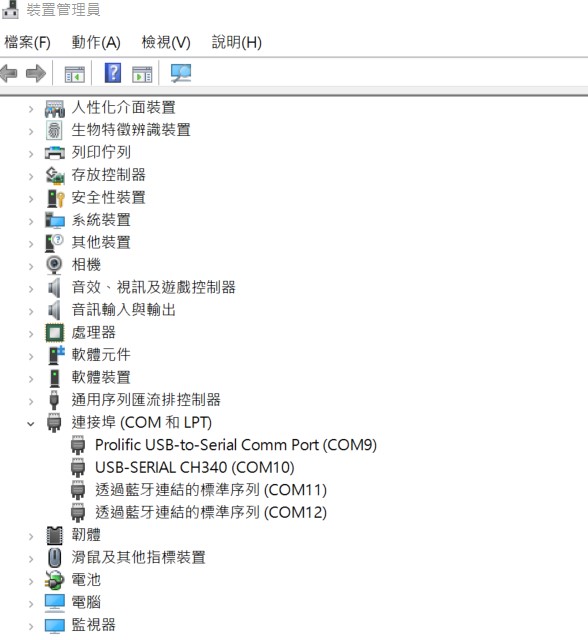
Check the Sriel port in Device Manager (查看PC端的串口号):
if you can not identify the Serial device , please check your serial driver.
Debug port connection (串口連接)
Log into Terminal Tool (进入串口调试终端):
login user: ubuntu/ubuntu
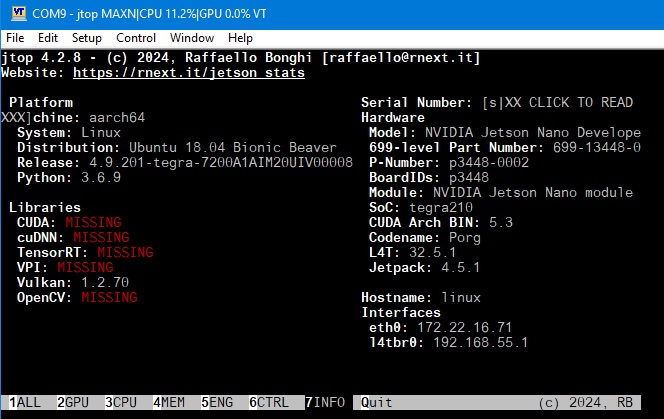
Linux 基本使用方法 for jetson series(Linux System Basic Operating Method for jetson series)
- check module
$ cat /proc/device-tree/model
- check OS release version
ubuntu@localhost:~$ cat /etc/os-release
NAME="Ubuntu"
VERSION="18.04.5 LTS (Bionic Beaver)"
ID=ubuntu
ID_LIKE=debian
PRETTY_NAME="Ubuntu 18.04.5 LTS"
VERSION_ID="18.04"
- check tegra version
ubuntu@localhost:~$ cat /etc/nv_tegra_release
R32 (release), REVISION: 5.1, GCID: 26202423, BOARD: t186ref, EABI: aarch64, DATE: Fri Feb 19 16:50:29 UTC 2021
- Install stress-ng
$ sudo apt install stress-ng
- Execute stress test
$ stress-ng --cpu 0 --cpu-method all -t 1h
- Install jtop
$ sudo apt update
$ sudo apt install python3-pip
$ sudo pip3 install -U jetson-stats
$ jtop
- No login prompt display: Connect debug cable and install login manager.
Reference: <https://support.system76.com/articles/login-loop-ubuntu/>
$ sudo apt install --reinstall gdm3 ubuntu-desktop gnome-shell (選gdm3)
$ sudo systemctl reboot
NVIDIA 模塊安裝(NVIDIA Jetson Module Installation)
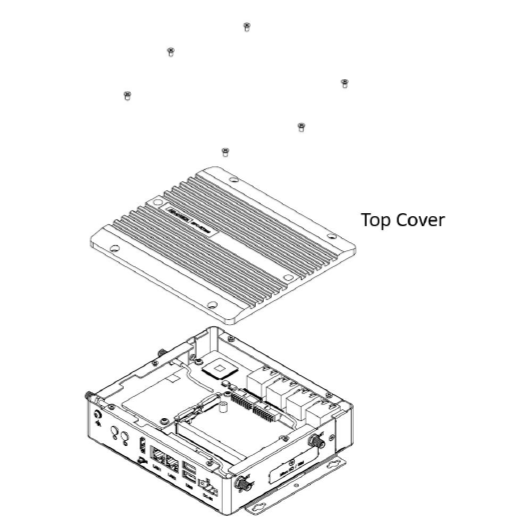
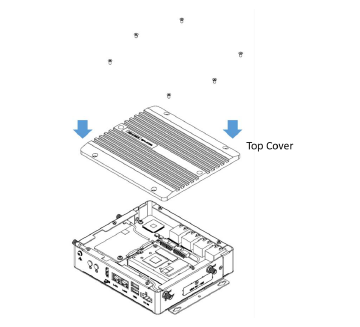
Step1: Remove 6 screws on Top Cover and then lift up Top Cover
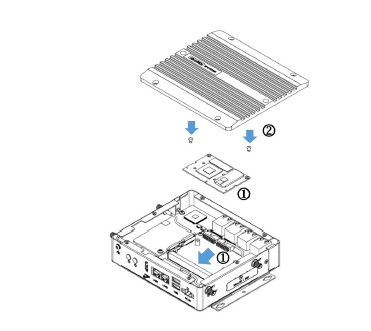
Step2: Choose the right heat spreader according the JestonTM module you used Smear grease on heat spreader (Top) Remove blue tapes from thermal pad (Bottom) Fix the heat spreader on Top Cover by two screws
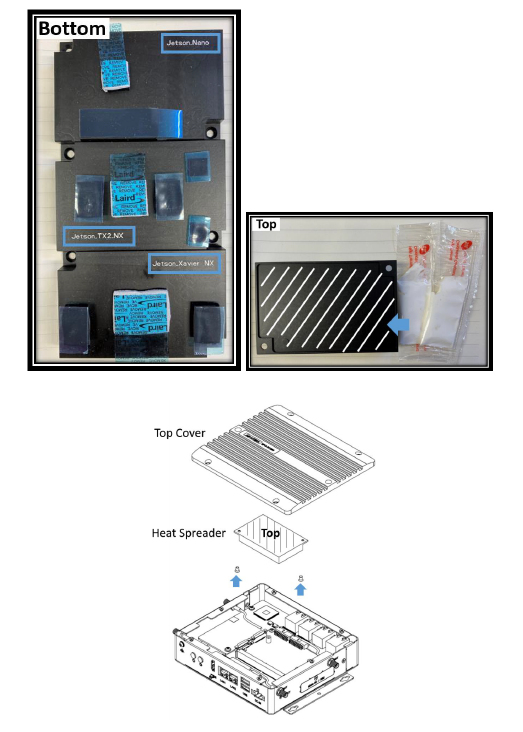
Step3: Plug JestonTM module into Sockets of carrier board. Lock 2 screws to fix JestonTM module
Step4: Put the Top Cover on and then lock 6 screws on top of it
Step5: Enjoy your AI journey