Get Started with Windows 10 IoT Version 1.4.1 Enterprise Using the Advantech RSB-3720, an Arm-based 2.5” Pico-ITX with NXP i.MX 8M Plus
1.Introdouction
Advantech has updated its board support packages (BSP) to version 1.4.1, based on i.MX Windows 10 IoT released by NXP. These updates have been installed on the RSB-3720, featuring i.MX 8M Plus series processor platforms to support Windows 10 IoT Enterprise Version 1.4.1.
This how-to article describes the process of building and installing Windows 10 IoT BSP Version 1.4.1 on the Advantech RSB-3720. The highly optimized Windows 10 IoT BSP simplifies the setup installation with only one SD card, making it as easy as installing Windows OS on X86.
Additionally, Version 1.4.1 includes all the necessary code, documents, and tools to help users build and run Windows 10 IoT on the i.MX 8M Plus from scratch. Check our release notes for a full review of the capabilities of Windows 10 on Arm of the i.MX 8M Plus processor.
2. Prerequisites
- The Advantech RSB-3720 — a 2.5” Pico-ITX SBC with NXP i.MX8M Plus SOC
- 1 x 8GB Micro SD card for flashing the OS installer
- 1 x micro USB cable for flashing the boot loader
- 1 x power adapter (input: 100 ~ 240V AC 50/60Hz; output: DC 12V 3A; Advantech P/N: 96PSA-A36W12R1-3)
Necessary Software:
- Win32 Disk Imager
Please follow the link below to download an executable file.
3. Install Windows 10 IoT Enterprise on RSB-3720
3-1. The image package you downloaded.

3-2. Prepare one 32GB SD card for flashing OS installer in your host PC whether it is Linux or Windows operating system.
For the Windows operating system:
Use the Win32 Disk Imager to prepare the 1 x 32GB Mirco SD card used for flashing the OS installer
with the Windows-based Host PC.
Start the OS installer process.
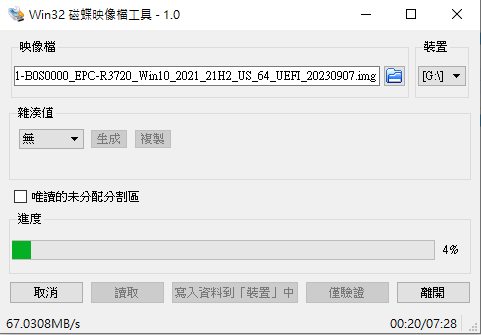
Finish the OS installer process and close the Win32 Disk Imager tool.

3-5. Flash Windows IoT to eMMC
A. Set up the SW1 jumper on the RSB-3720 for SD boot. (ON-ON-OFF-OFF).

B. Connect the HDMI cable on the device.

C. Insert a micro SD card and power the device on. The system will first start to run installation.

Next, the system will reboot again and enter the setup process.
C. Set up the SW1 jumper on the RSB-3720 for eMMC boot. (OFF-ON-OFF-OFF).
A Window 10 IoT enterprise desktop will appear on the screen after the settings are complete.


4. Conclusion
Version 1.4.1 significantly reduces the installation process, taking only about 15 minutes. So, grab a cup of coffee while you wait. More native functions are now enabled, such as dual LANs and native HDMI. You can experience its out-of-the-box capabilities and meet your development needs.