AOM-2721 Yocto user guide
Contents
- 1產品介紹(Product introduction ) 1.1產品特性(Product Features) 1.2產品官網連結(Product official website link)
- 2硬件接口說明(Hardware interface introduction) 2.1接口布局和尺寸(Layout and Sizes) 2.2EPC-R2860 接口布局圖 Board Dimension Layout 2.3主板内置插针式引脚排序方式 (Pin Header defination) 2.4Internal I/O, Jummper/Switch List:
- 3快速入門 (Quick Start) 3.1系统下载 (OS Download) 3.2Recovery & Rescue 燒錄方法 (Recovery & Rescue method) 3.2.1Reformat 3.2.2Flash UFS 3.2.3Flash eMMC 3.3Linux BSP編譯方法(Linux BSP Compile Method)
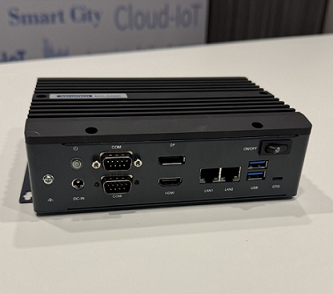
產品介紹(Product introduction )
產品特性(Product Features)
- Qualcomm 8 Kryo cores up to 2.7GHz
- Onboard LPDDR5 8GB, 8533MT/s memory
- Onboard 128GB UFS and 128GB eMMC
- 1x 2ch. LVDS, 1x DP and 1x HDMI for displays
- 2x USB3.2 Gen1, 2x USB2.0, 2x PCIe Gen3.0 x1, 2x 4wire UART, 1x SPI,16x GPIO, 1x I2C, 2x MIPI-CSI x4
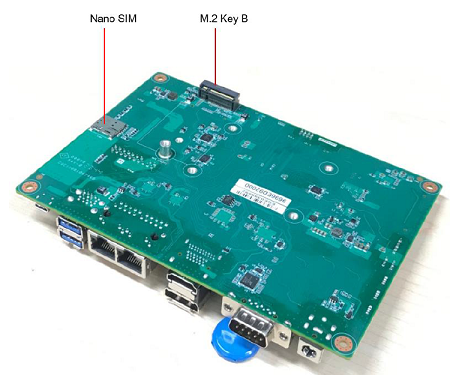
- 1x Micro SD and 1x Nano SIM
- Support Windows 11 IoT Enterprise
產品官網連結(Product official website link)
硬件接口說明(Hardware interface introduction)
接口布局和尺寸(Layout and Sizes)
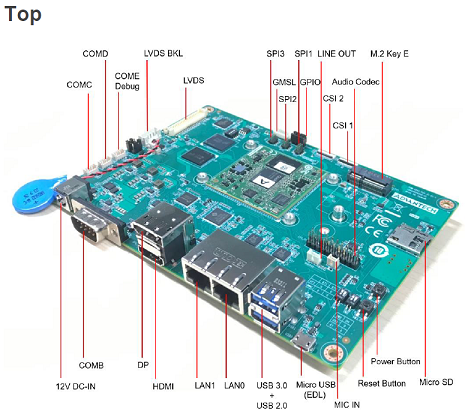
EPC-R2860 接口布局圖 Board Dimension Layout
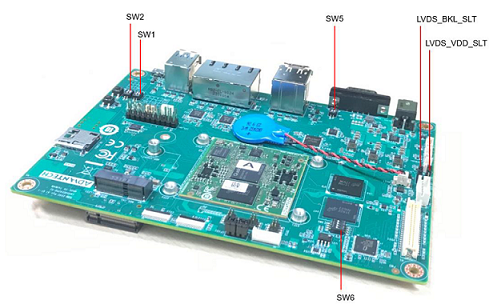
SW6
主板内置插针式引脚排序方式 (Pin Header defination)
Internal I/O, Jummper/Switch List:
| Position | Description |
|---|---|
快速入門 (Quick Start)
系统下载 (OS Download)
Yocto 4.0 :
SW1
- SW1(1-off,2-on) : eMMC boot
- SW1(1-on,2-on) : UFS boot
SW2
- SW2(1-on): Forced Recovery
- SW2(1-off): Normal Boot
- SW2(2-on): AT mode
- SW2(2-off):ATx mode
Recovery & Rescue 燒錄方法 (Recovery & Rescue method)
1. Download the Qualcomm Software Center
2. Open the Qualcomm Software Center
3. Search "PCAT" in the search bar
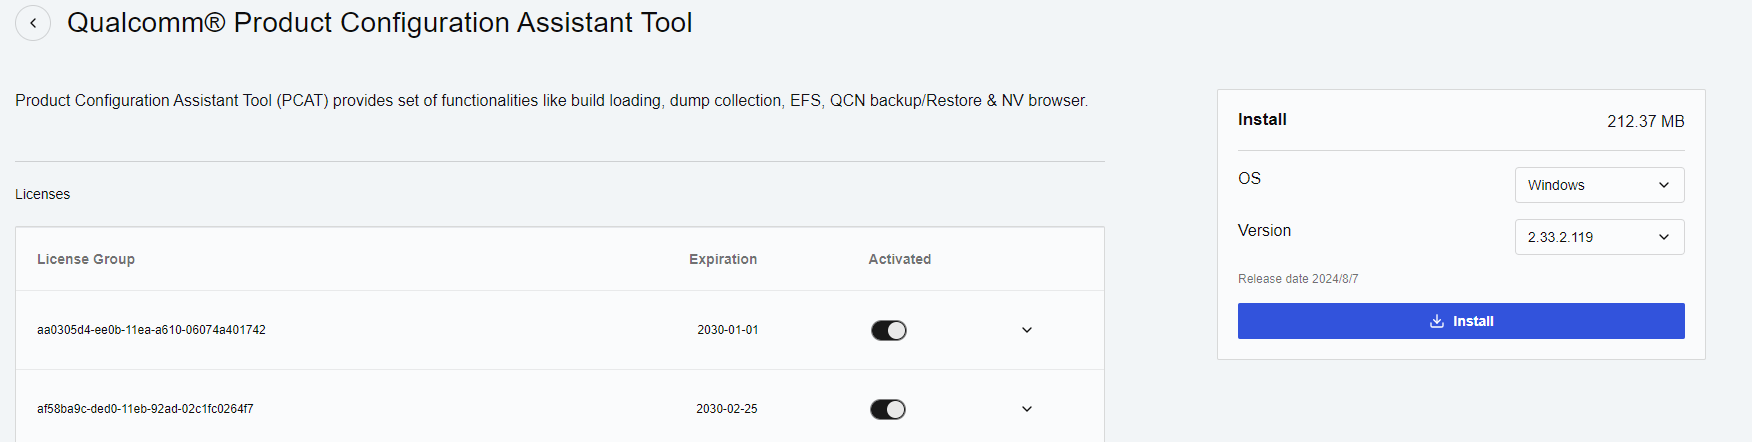
4. Click Qualcomm® Product Configuration Assistant Tool
5. Select Qualcomm® Product Configuration Assistant Tool version
Version: 2.33.2.119
6. Install Qualcomm® Product Configuration Assistant Tool 2.33.2.119
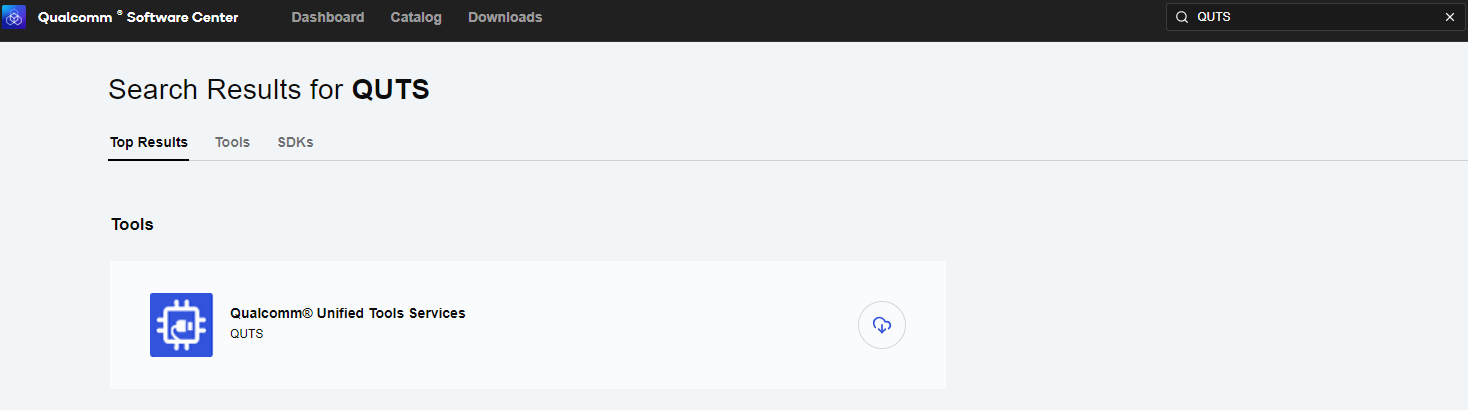
7. Search "QUTS" in the search bar
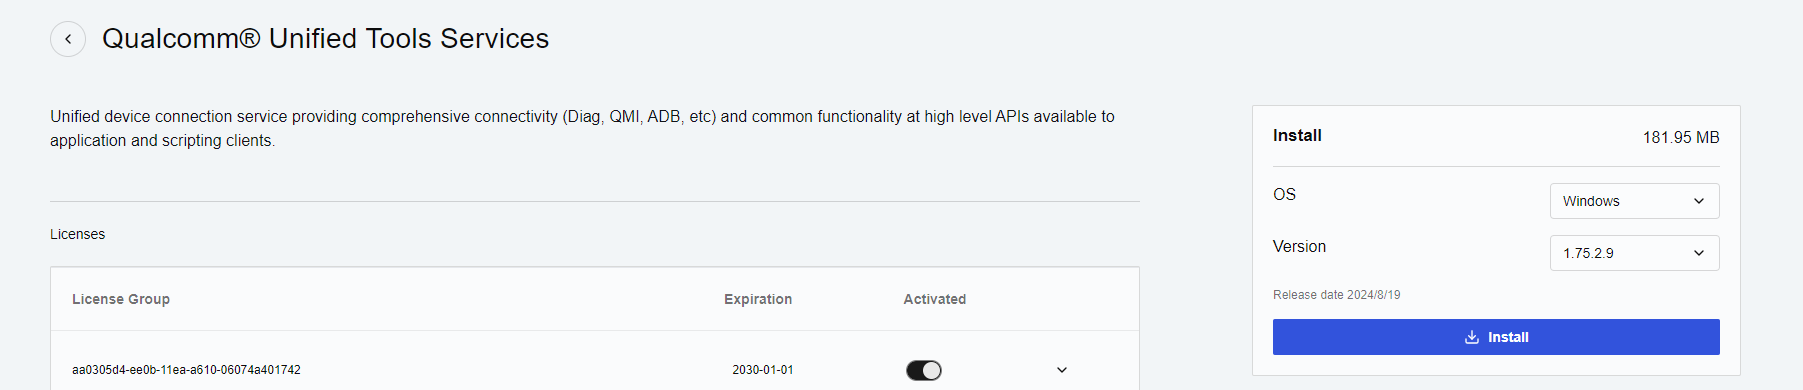
8. Click the Qualcomm® Unified Tools Services
9. Select Qualcomm® Unified Tools Services version
Version : 1.75.2.9
10. Install Qualcomm® Unified Tools Services 1.75.2.9
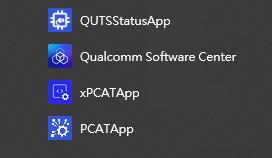
11. You will find the new application in your Windows system .
12. Unzip the UFS File and eMMC File
For example :
2860A1AIM38LIV11026_2024-11-17_ufs.tgz
2860A1AIM38LIV11026_2024-11-17_emmc.tgz
13 Connect your device via Micro USB.
14. if your pc can not identify the USB , please download the " ' Qualcomm USB Driver"
15. Search " Qualcomm USB Driver " in the search bar , then install the driver.
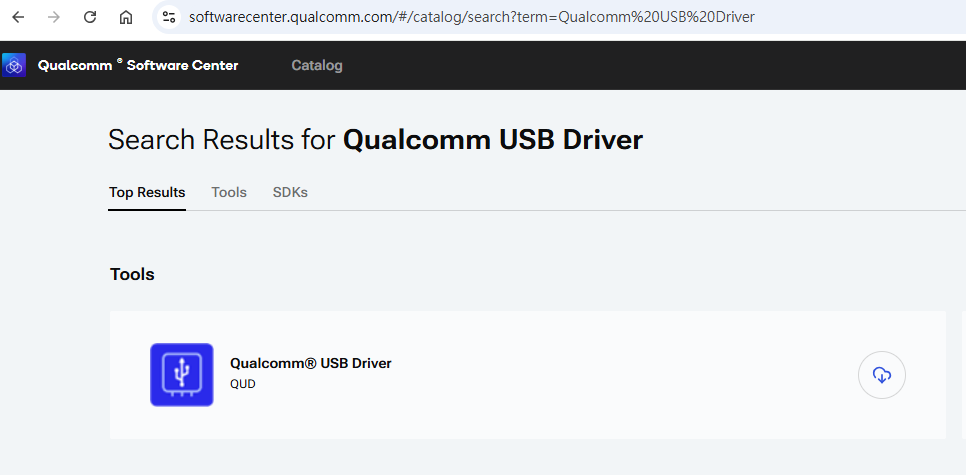
Reformat
For confirmation, we will erase the partition before UFS installation.
1. Select provision button

2. Add the prog_firehose_ddr.elf and provision_ufs31.xml in UFS folder.

3. Then press "OK" , it will start to do USF Provision.

4. When the Provision finished , you can see the result in message window.

Flash UFS
1. Change the SW1 and SW2
Flash UFS: the SW1 switch to 1-on, 2-on Forced Recovery : The SW2 switch to 1-on ,2 - on .
2. Turn on the power
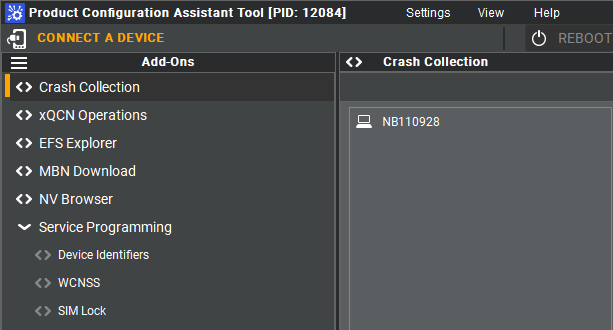
3. Open " PCATApp" Tool
4. Click " Connect A Device"
5. Select "Qualcomm HS-USB QDLoader 9008 (COM11)
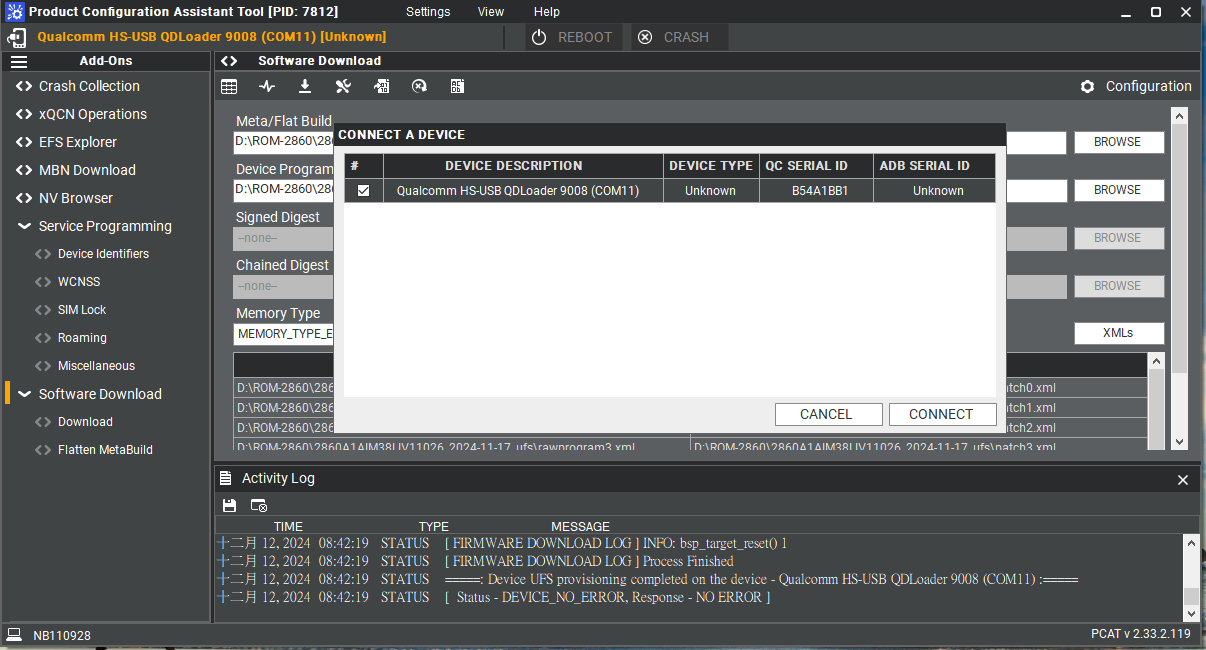
6. Click " Connect " device

7. When you connected successfully , it will show "qreen word" - Qualcomm HS-USB QDLoader 9008 (COM 11)
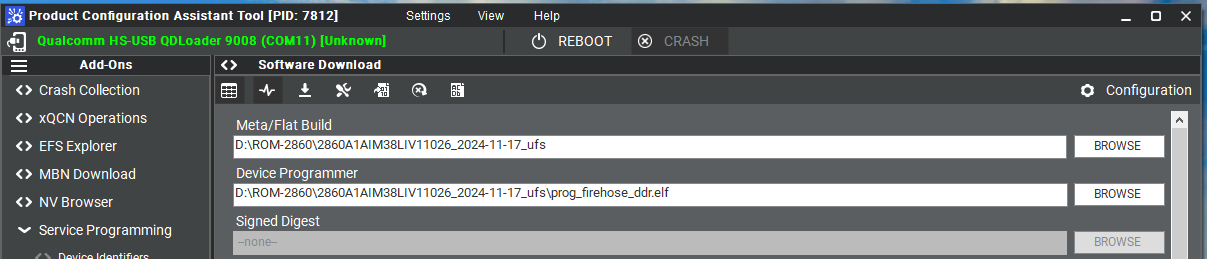
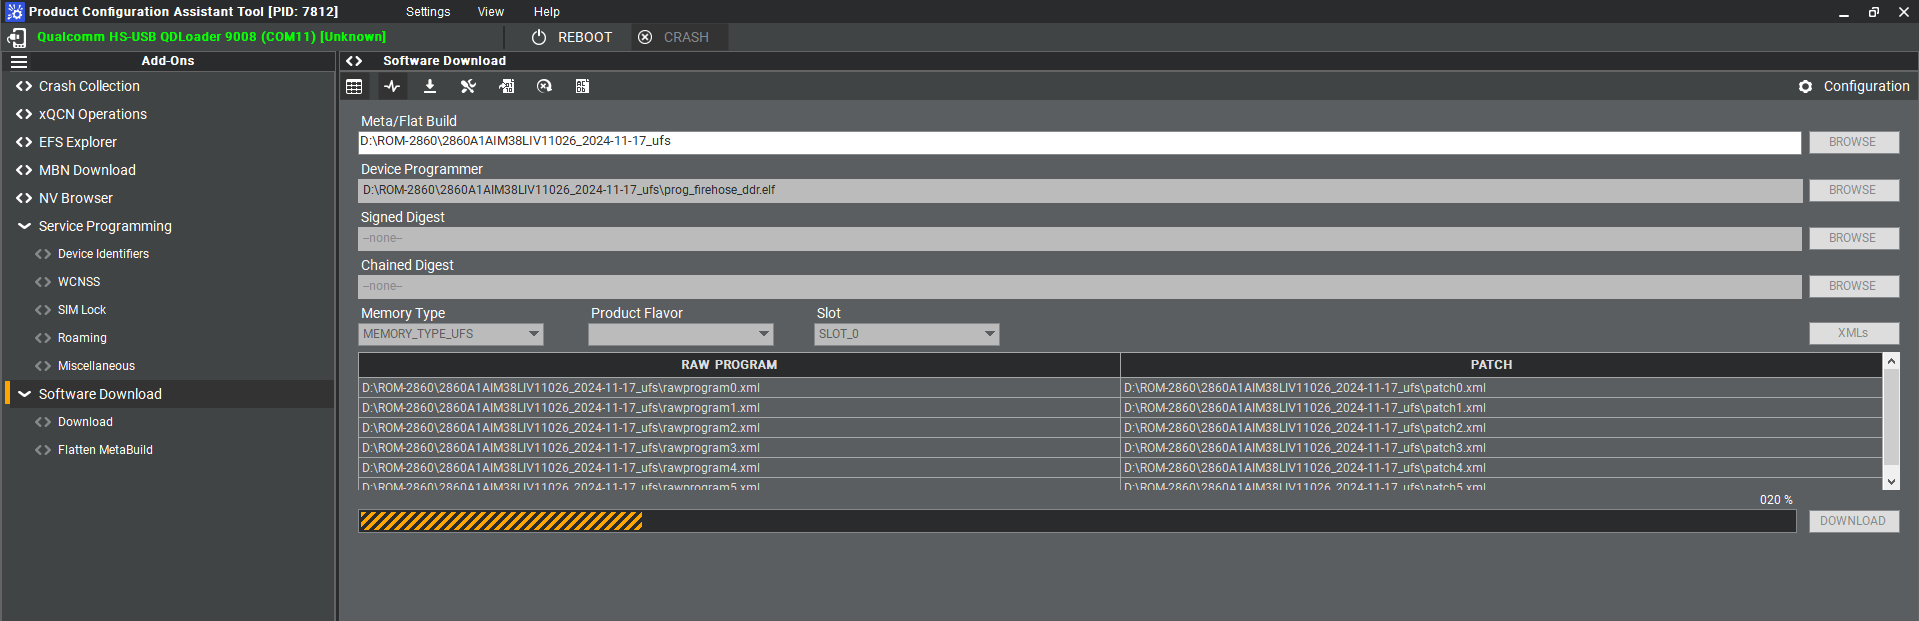
8. Select UFS Folder in PCAT Tool , the Tool will help load Files automatically and Select "MEMORY_TYPE_UFS"
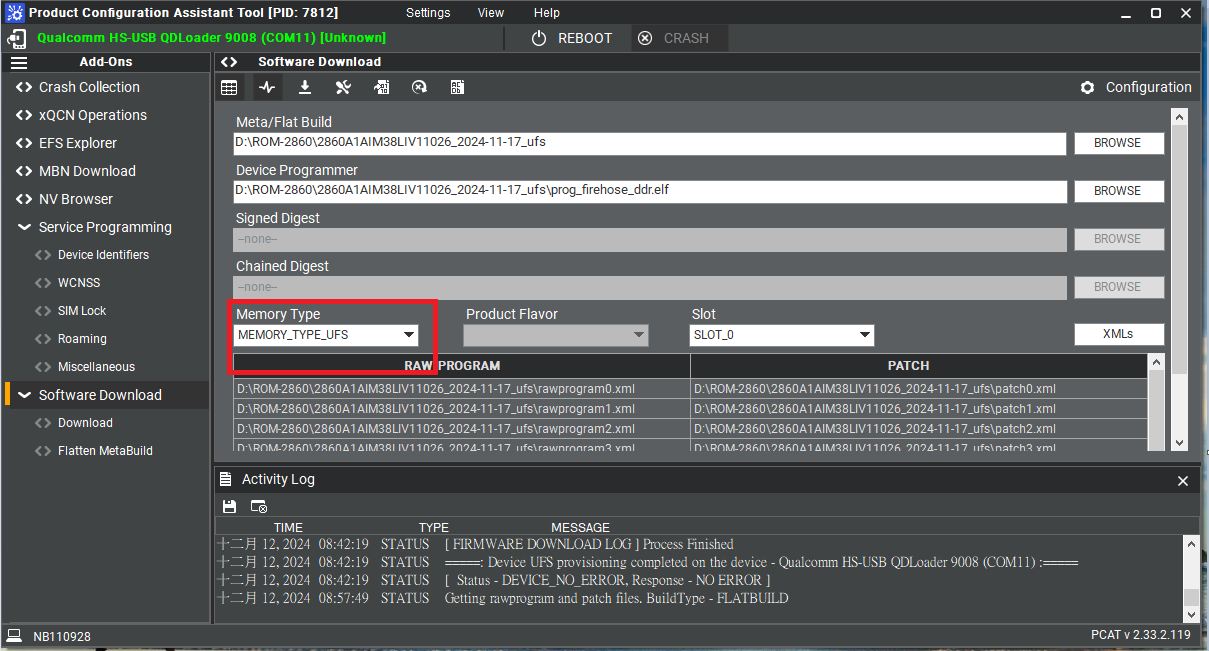
9. Click " Download"
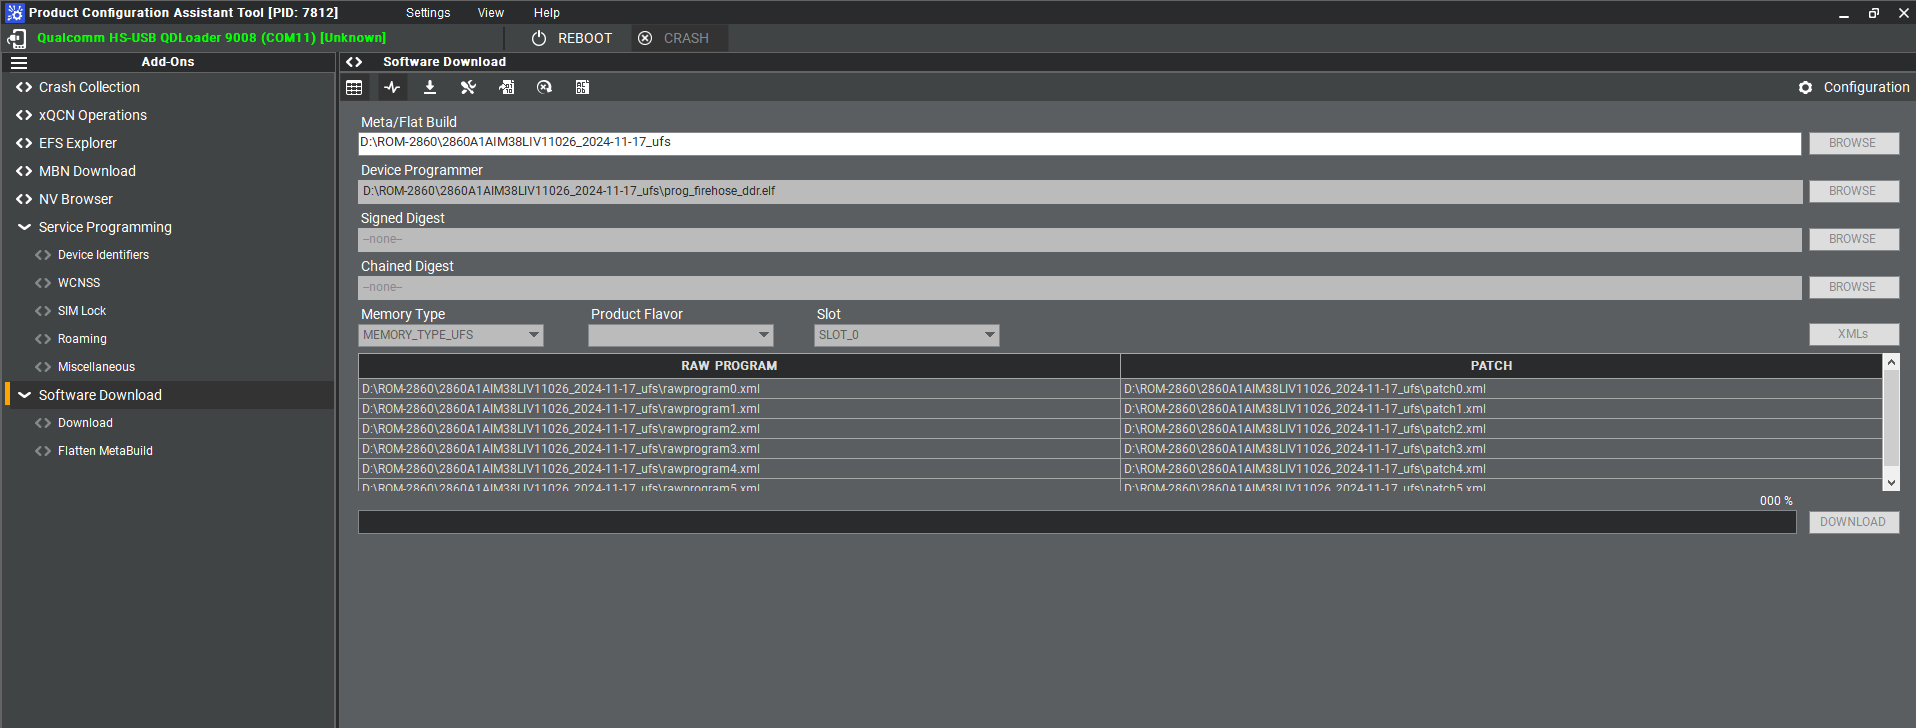
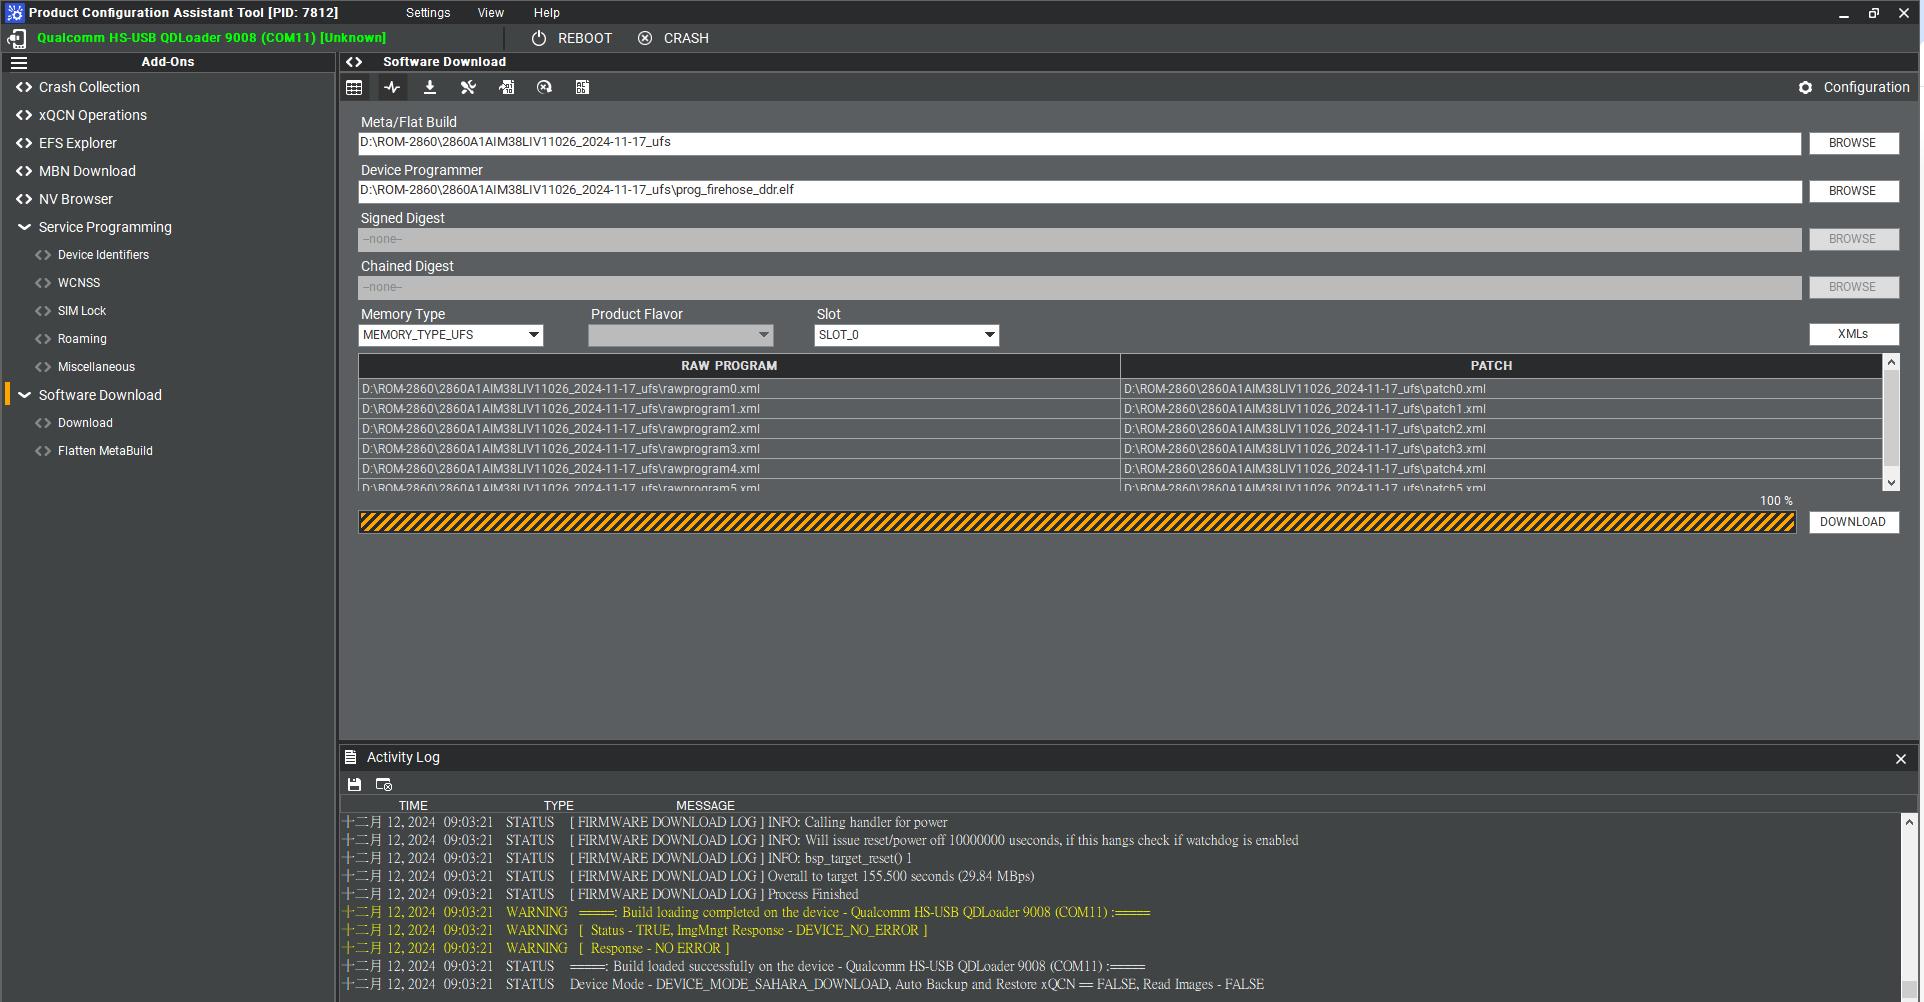
10. UFS Download Status
' 11. UFS Donwload ' completed
12. When you finish the download process , please change the switch.
Flash UFS: the SW1 switch to 1-off, 2-off Forced Recovery : The SW2 switch to 1-on ,2 - on.
Flash eMMC
1. Turn off the Power
2. Change the SW1 and SW2
Flash eMMC: the SW1 switch to 1-off, 2-on Forced Recovery : The SW2 switch to 1-on ,2 - on .
3. Turn on the power
4. Make sure the device connection status.
5. If the device disconnect with PCAT Tool , please connect it again.
6. Select eMMC Folder.
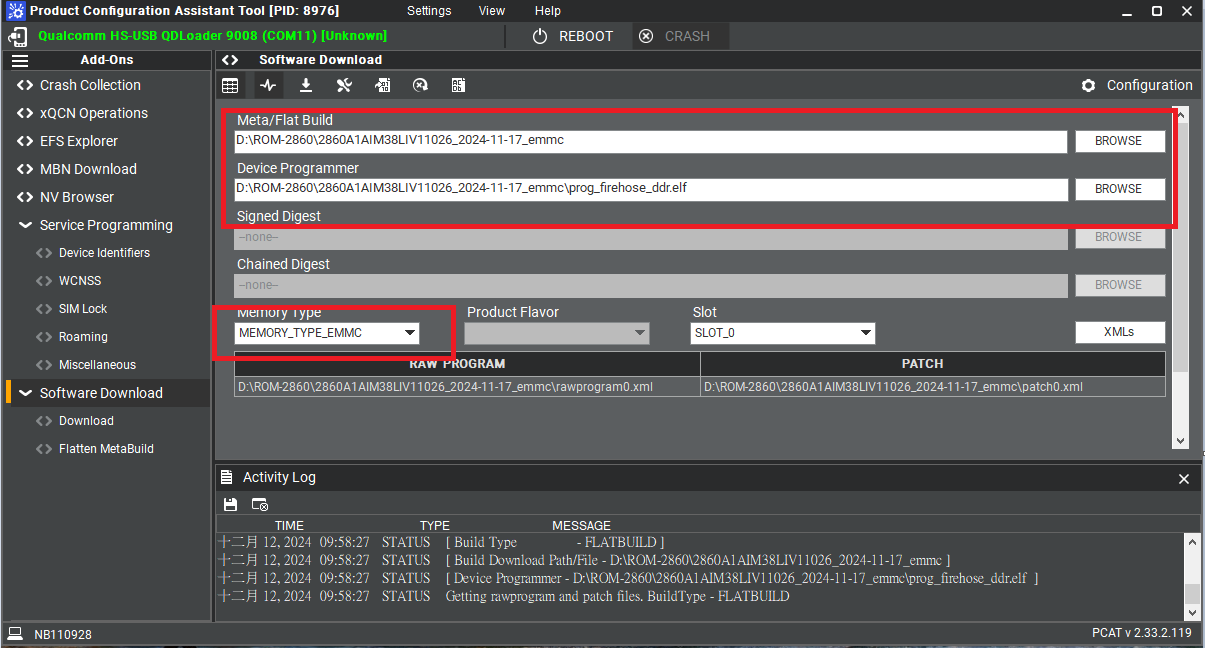
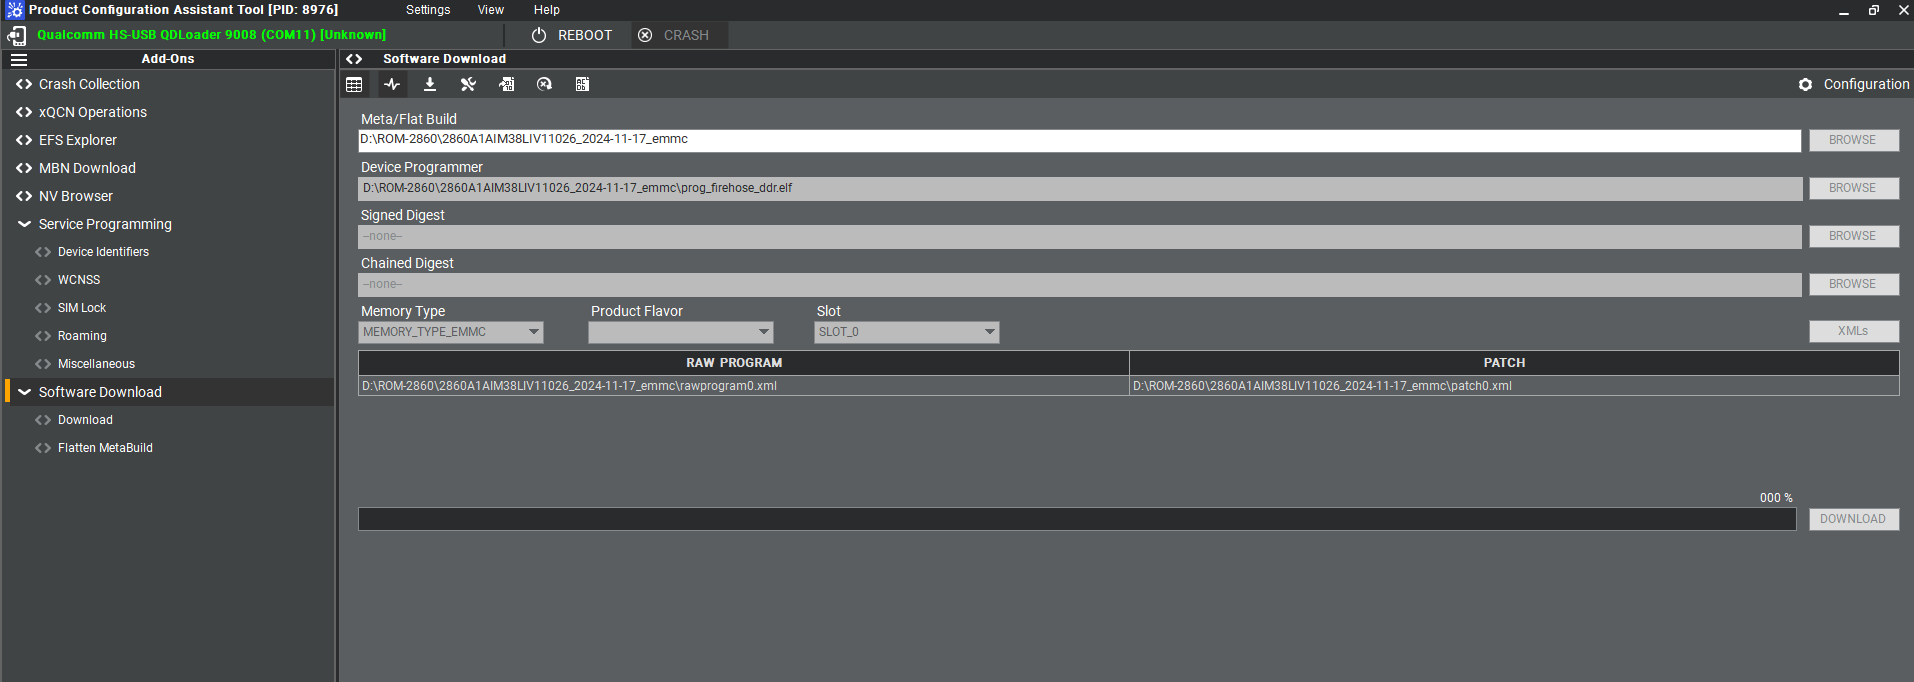
7. Make sure the setting ,then press " Download " button.
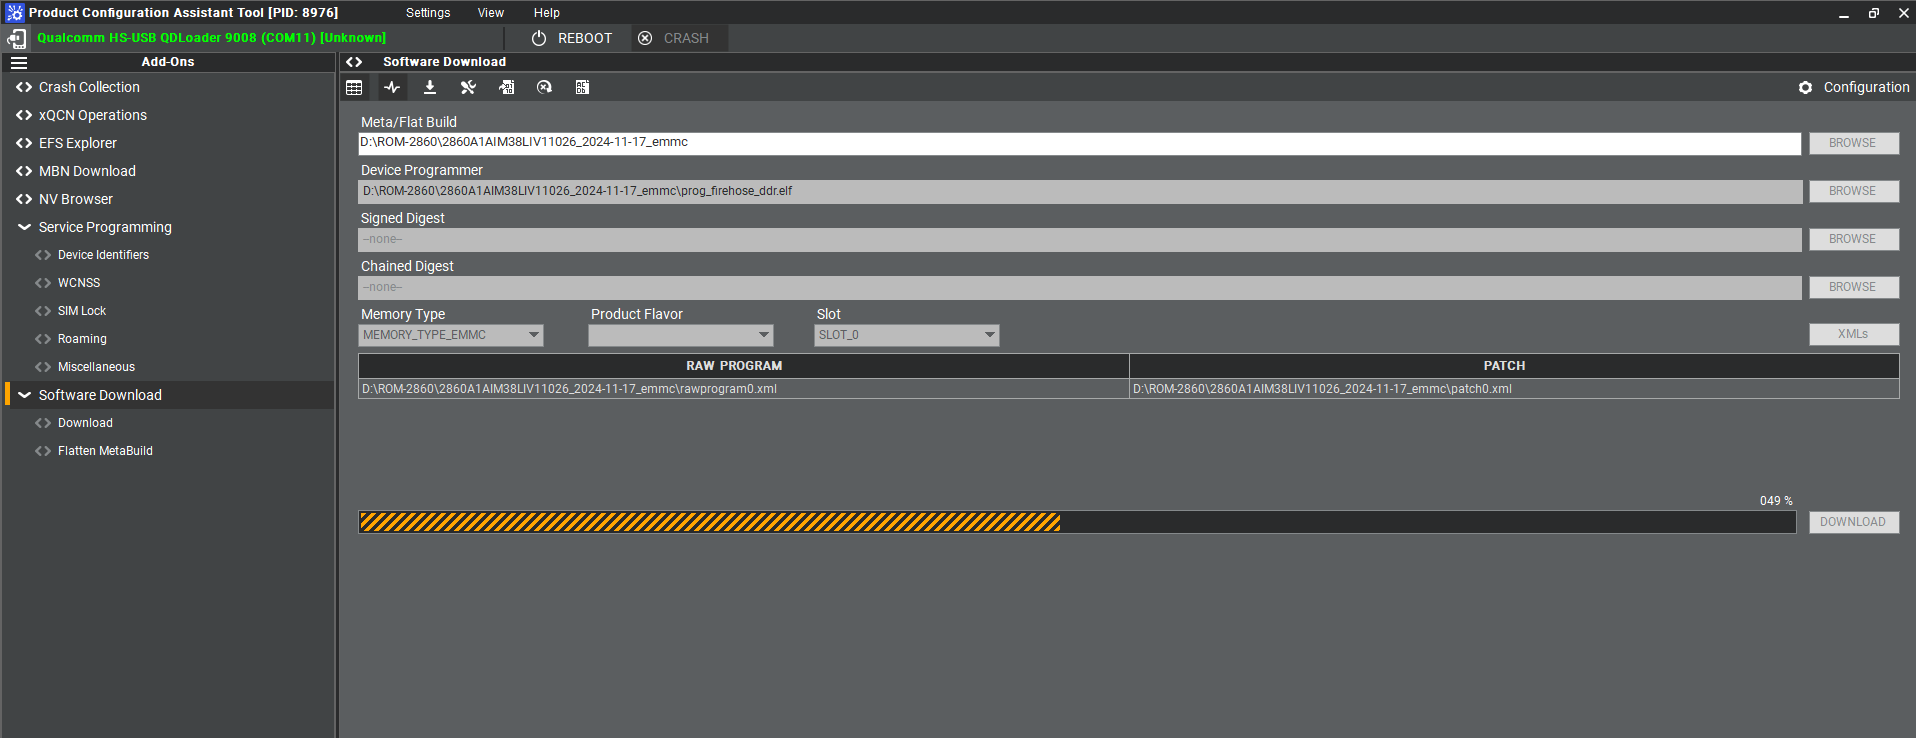
8. eMMC download status
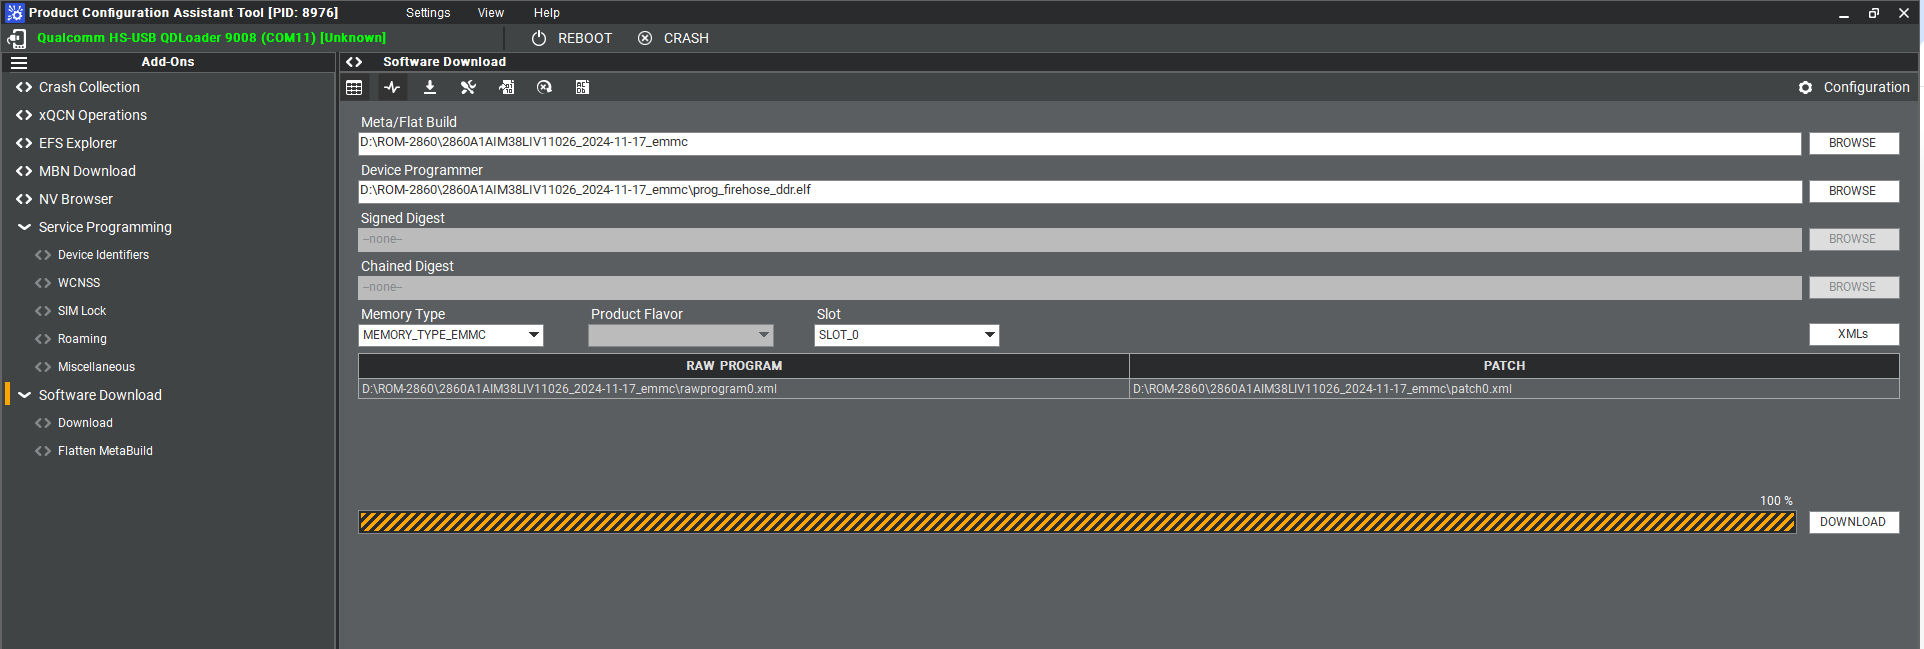
' 9. eMMC Donwload ' completed
10. When the eMMC installation finished . Close the PCAT tool ,
' 11 ' Please remove the mirco usb cable, turn off the power
12. eMMC boot up : SW1 switch to 1-off, 2-on Forced Recovery : The SW2 switch to 1-off ,2 - off .
13. Connect debug cable and open the terminal , turn on the power .
14. If you have done " Reformat " , the message will show " DDR: Start of DDR Training Init "
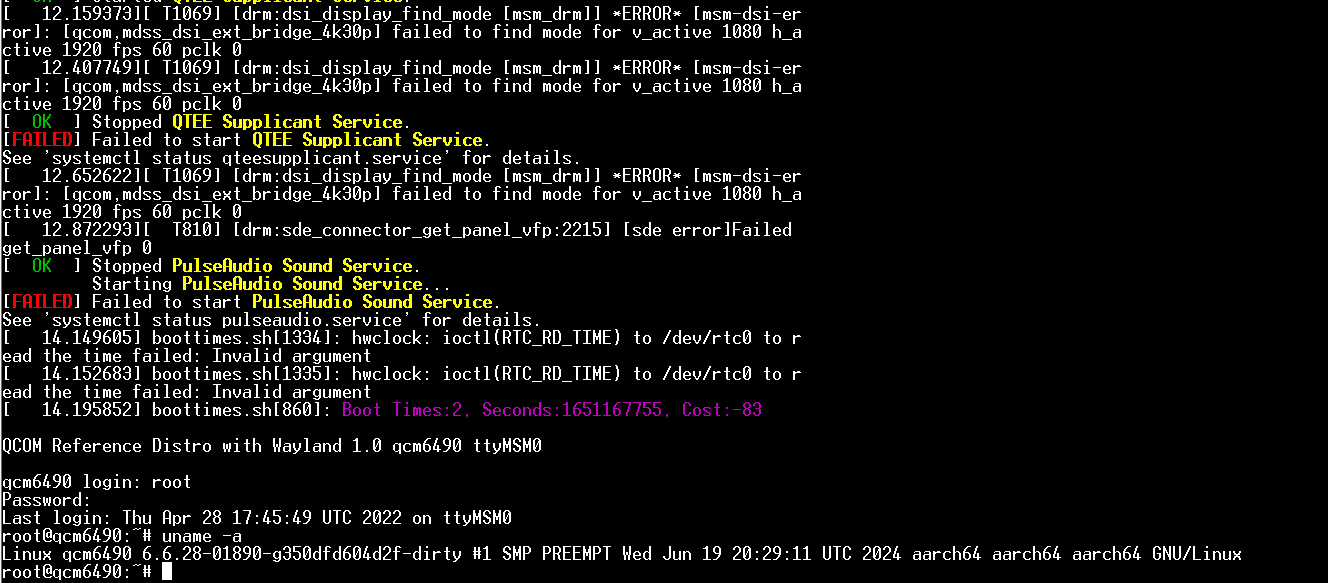
15. When the systm boot up , you need to type " qcs6490-rom2860a1 login: root " , " Password: oelinux123 "
16. After type the login and password , and you also can chek the image information about date , kernel version etc..
Linux BSP編譯方法(Linux BSP Compile Method)
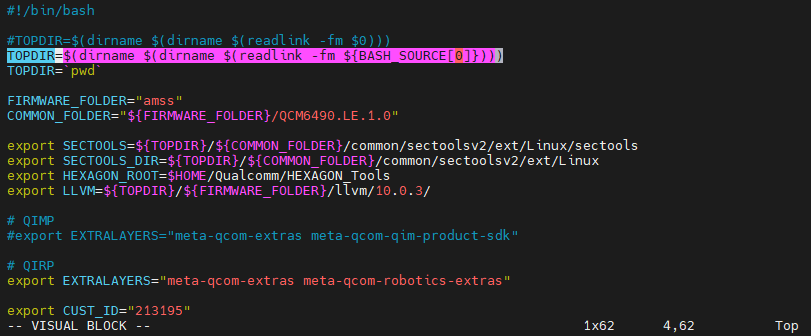
Modify scripts/env.sh file:
#!/bin/bash
#TOPDIR=$(dirname $(dirname $(readlink -fm $0))) TOPDIR=$(dirname $(dirname $(readlink -fm ${BASH_SOURCE[0]})))

![]()