Introduction
This document describes how to work with the RISC and Qualcomm LE GA1.7 (QLI 1.7) Board Support Package (BSP) release.
Yocto Version
Yocto 5.0.14
Kernel Version
Kernel 6.6.116
Host Machine Requirements
OS
Ubuntu 20.04 or Ubuntu 22.04
CPU
Intel Core-i7 Processor (>= 8 cores)
RAM
16+ GB RAM
Disk
350 GB free disk space (more is recommended and SSD is suggested for better performance)
Docker Install and BSP Download
Install Docker Engine on Your Platform
Please refer to Docker Installation Guide for details
Pull Docker Images
$ sudo docker pull advrisc/u22.04-qcslbv1:latest
Run Docker Example
$ mkdir -p /home/bsp/myLinux
$ sudo docker run --privileged -it --name qclinux -v /home/bsp/myLinux:/home/adv/BSP:rw advrisc/u22.04-qcslbv1 /bin/bash
adv@7cc0fa834366:~$ sudo chown adv:adv -R BSP
Download BSP
$ cd BSP
$ repo init -u https://AIM-Linux@dev.azure.com/AIM-Linux/adv-arm-yocto-bsp/_git/adv-arm-yocto-bsp -b qcom-linux-scarthgap -m ${OFFICIAL_MANIFEST}
$ repo sync -c -j${YOUR_CPU_CORE_NUM}
- AOM-2721: A example of
${OFFICIAL_MANIFEST}is aom2721a1_yocto5.0.14-le1.7_v0.0.1_kernel-6.6.116_qcs6490+qcs5430.xml - AOM-5721: A example of
${OFFICIAL_MANIFEST}is aom5721a1_yocto5.0.14-le1.7_v0.1.0_kernel-6.6.116_qcs6490.xml - MIO-5355: A example of
${OFFICIAL_MANIFEST}is mio5355a1_yocto5.0.14-le1.7_v0.0.1_kernel-6.6.116_qcs6490.xml - DS-011: A example of
${OFFICIAL_MANIFEST}is ds011a1_yocto5.0.14-le1.7_v0.0.1_kernel-6.6.116_qcs6490.xml - AIR-055: A example of
${OFFICIAL_MANIFEST}is air055a1_yocto5.0.14-le1.7_v0.1.0_kernel-6.6.116_iq9075.xml
If you want to get latest bsp
$ cd BSP
$ repo init -u https://AIM-Linux@dev.azure.com/AIM-Linux/adv-arm-yocto-bsp/_git/adv-arm-yocto-bsp -b qcom-linux-scarthgap -m adv-6.6.116-QLI.1.7-Ver.1.1_robotics-sdk-1.1.xml
$ repo sync -c -j${YOUR_CPU_CORE_NUM}
Get and Unzip the Downloads Files
Yocto downloads file:[ downloads.qcs6490.le.1.7.tar.gz ]
The size of downloads.qcs6490.le.1.7.tar.gz is 53,620,541,286 byte (52,363,810 KB)
The md5sum of downloads.qcs6490.le.1.7.tar.gz is 7b980a7379c43727226e637da5a9a57e
Build Instructions
Build Yocto Images in the Docker Container
$ cd /home/adv/BSP
$ MACHINE=${YOCTO_MACHINE_NAME} DISTRO=qcom-robotics-ros2-humble QCOM_SELECTED_BSP=custom source setup-robotics-environment
$ bitbake-layers add-layer ../layers/meta-advantech-qualcomm
$ bitbake-layers add-layer ../layers/meta-qt6 # Optional: QT6 support
$ ../qirp-build qcom-robotics-full-image
- AOM-2721:
${YOCTO_MACHINE_NAME}is qcs6490aom2721a1 - AOM-5721:
${YOCTO_MACHINE_NAME}is qcs6490aom5721a1 - MIO-5355:
${YOCTO_MACHINE_NAME}is qcs6490mio5355a1 - DS-011:
${YOCTO_MACHINE_NAME}is qcs6490ds011a1 - AIR-055:
${YOCTO_MACHINE_NAME}is qcs9075air055a1
Output images: build-qcom-robotics-ros2-humble/tmp-glibc/deploy/images/${YOCTO_MACHINE_NAME}/qcom-robotics-full-image
UFS and eMMC Flash Images
The output image folder supports UFS flashing by default. You may need to prepare the flash folder manually depending on your target storage type (UFS or eMMC). The partition_ufs/ and partition_emmc/ directories contain partition layout files specific to each storage type. You can use the following method to prepare for UFS or eMMC flashing.
UFS Flash Images
1. Remove all gpt*.bin and *.xml files from the image root folder.
$ cd <image_folder>
$ rm -f gpt*.bin *.xml
2. Copy the following files from partition_ufs/ to the image root folder.
$ for f in partition_ufs/gpt_backup{0..5}.bin; do [ -f "$f" ] && cp "$f" .; done
$ for f in partition_ufs/gpt_main{0..5}.bin; do [ -f "$f" ] && cp "$f" .; done
$ for f in partition_ufs/rawprogram{0..5}.xml; do [ -f "$f" ] && cp "$f" .; done
$ for f in partition_ufs/patch{0..5}.xml; do [ -f "$f" ] && cp "$f" .; done
$ cp partition_ufs/provision*.xml .
The folder is now ready for UFS flashing.
eMMC Flash Images
1. Remove all gpt*.bin and *.xml files from the image root folder.
$ cd <image_folder>
$ rm -f gpt*.bin *.xml
2. Copy the following files from partition_emmc/ to the image root folder.
$ for f in partition_emmc/gpt_backup{0..1}.bin; do [ -f "$f" ] && cp "$f" .; done
$ for f in partition_emmc/gpt_main{0..1}.bin; do [ -f "$f" ] && cp "$f" .; done
$ for f in partition_emmc/rawprogram{0..1}.xml; do [ -f "$f" ] && cp "$f" .; done
$ for f in partition_emmc/patch{0..1}.xml; do [ -f "$f" ] && cp "$f" .; done
The folder is now ready for eMMC flashing.
Device Guides
QCS6490
- AOM-2721
- AOM-5721
- MIO-5355
- DS-011
| SW1 | 1 | 2 |
|---|---|---|
| UFS | ON | ON |
| eMMC | OFF | ON |
| SW2 | 1 | 2 |
|---|---|---|
| USB EDL Mode | ON | |
| Normal Mode | OFF | |
| AT | ON | |
| ATX | OFF |
| AOM-5721 SW1 | 1 | 2 |
|---|---|---|
| UFS | OFF | |
| eMMC | ON | |
| USB EDL Mode | ON | |
| Normal Mode | OFF |
| AOM-DB6700 SW2 | 4 |
|---|---|
| USB EDL Mode | ON |
| Normal Mode | OFF |
| SW1 | 1 | 2 | 3 | 4 |
|---|---|---|---|---|
| USB EDL Mode | ON | |||
| Normal Mode | OFF | |||
| AT | ON | |||
| ATX | OFF | |||
| UFS | ON | |||
| eMMC | OFF | |||
| LVDS | ON | |||
| eDP | OFF |
| SW1 | 1 | 2 |
|---|---|---|
| UFS | ON | ON |
| eMMC | OFF | ON |
| SW7 | |
|---|---|
| USB EDL Mode | LEFT |
| Normal Mode | RIGHT |
IQ9075
- AIR-055
| SW1 | 1 |
|---|---|
| AT | ON |
| ATX | OFF |
| SW3 | 1 | 2 |
|---|---|---|
| USB EDL Mode | ON | ON |
| Normal Mode | OFF | OFF |
Recovery & Rescue
Using BSP Launcher or QDL(Qualcomm Device Download) tool to flash software images to the device.
Prepare images
Get the Official Images and Unzip
EX:
$ sudo tar -zxvf aom5721a1_yocto5.0.14-le1.7_v0.1.0_kernel-6.6.116_qcs6490_16g-8g_ufs+emmc_2026-05-21.tgz
Build Folder Images
cd ${workspace}/build-qcom-robotics-ros2-humble/tmp-glibc/deploy/images/${YOCTO_MACHINE_NAME}/qcom-robotics-full-image
Use BSP Launcher to Flash image on x86 Ubuntu Host
Please use BSP Launcher
Use QDL Tool to Flash Image on x86 Windows Host
QDL User and Installation Guide
Overview
Qualcomm Device Loader (QDL ) is a software tool that communicates with Qualcomm USB devices to upload a flash loader and flash software images.
Installation Guide
-
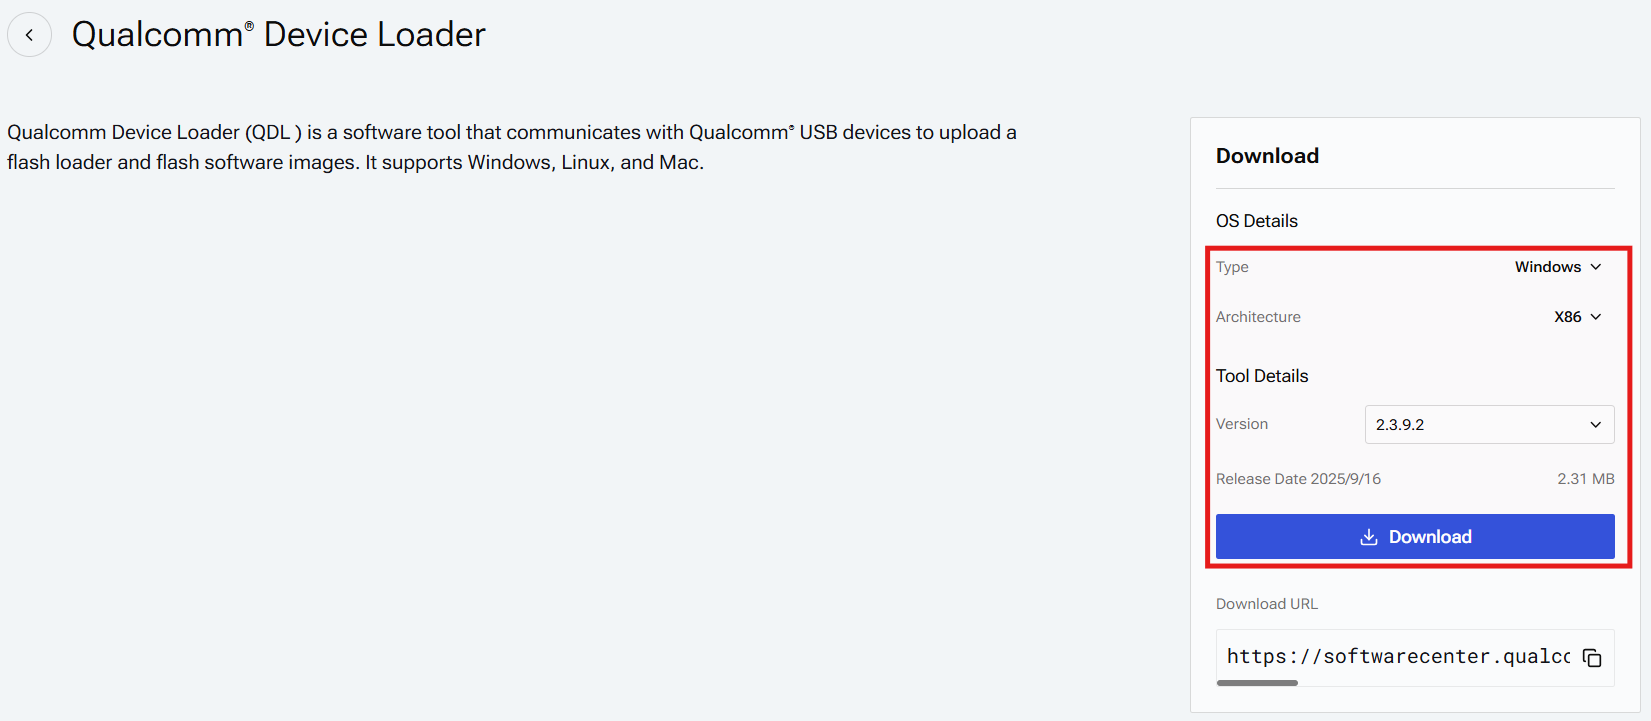
Download Qualcomm Device Loader from below link https://softwarecenter.qualcomm.com/catalog/item/Qualcomm_Device_Loader
-
According your host mach to select OS type and which version you want
-
Unzip download file in any path
-
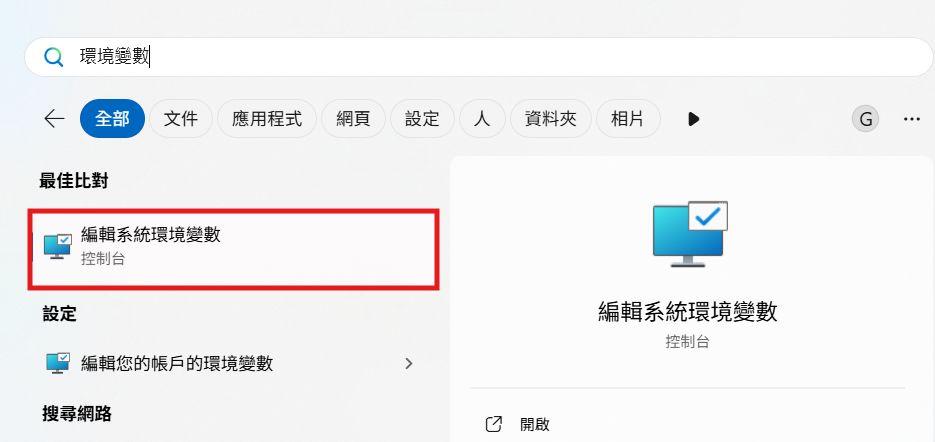
Serach Edit the system environment variables (?��?變數) to open Advanced system settings Also you can open Settings app ??System ??About ??Advanced system settings ??Advanced
-
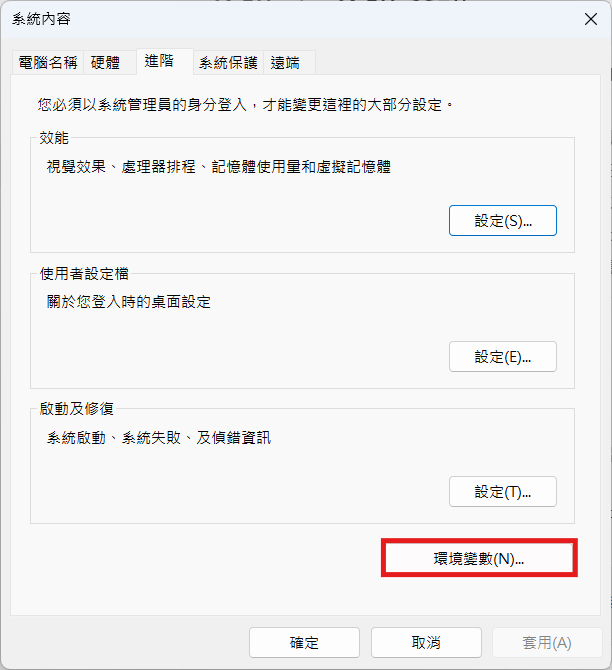
Select Environment Variables (?��?變數)
-
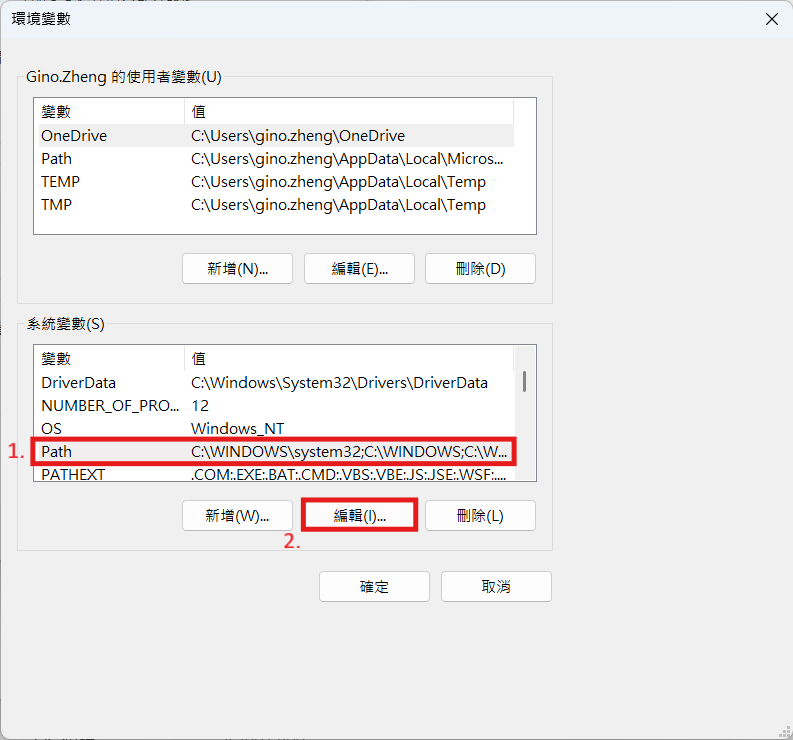
Select Path then edit (編輯)
-
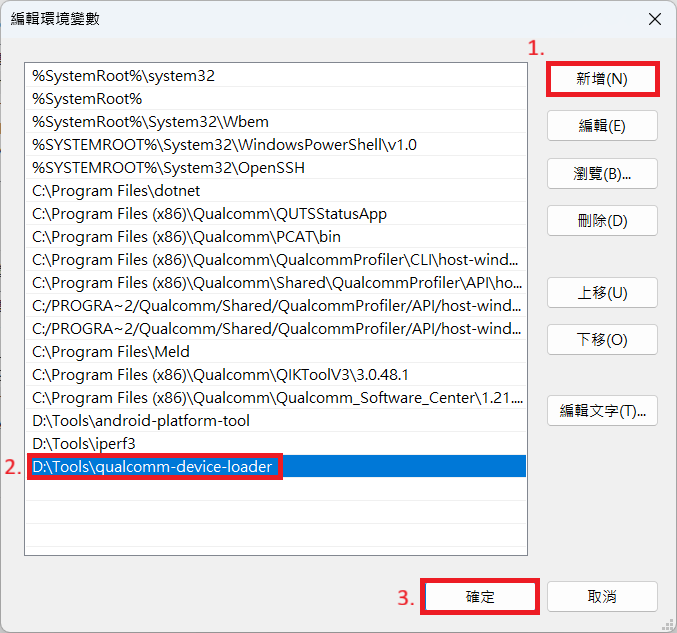
Select New (?��?) and type the Qualcomm Device Loader path then select OK (確�?)
-
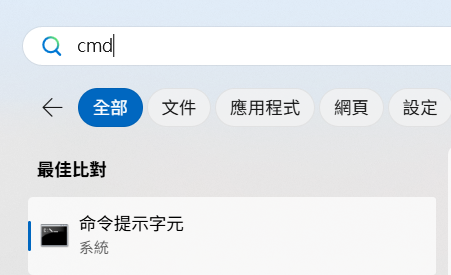
Search cmd to open Windows Terminal
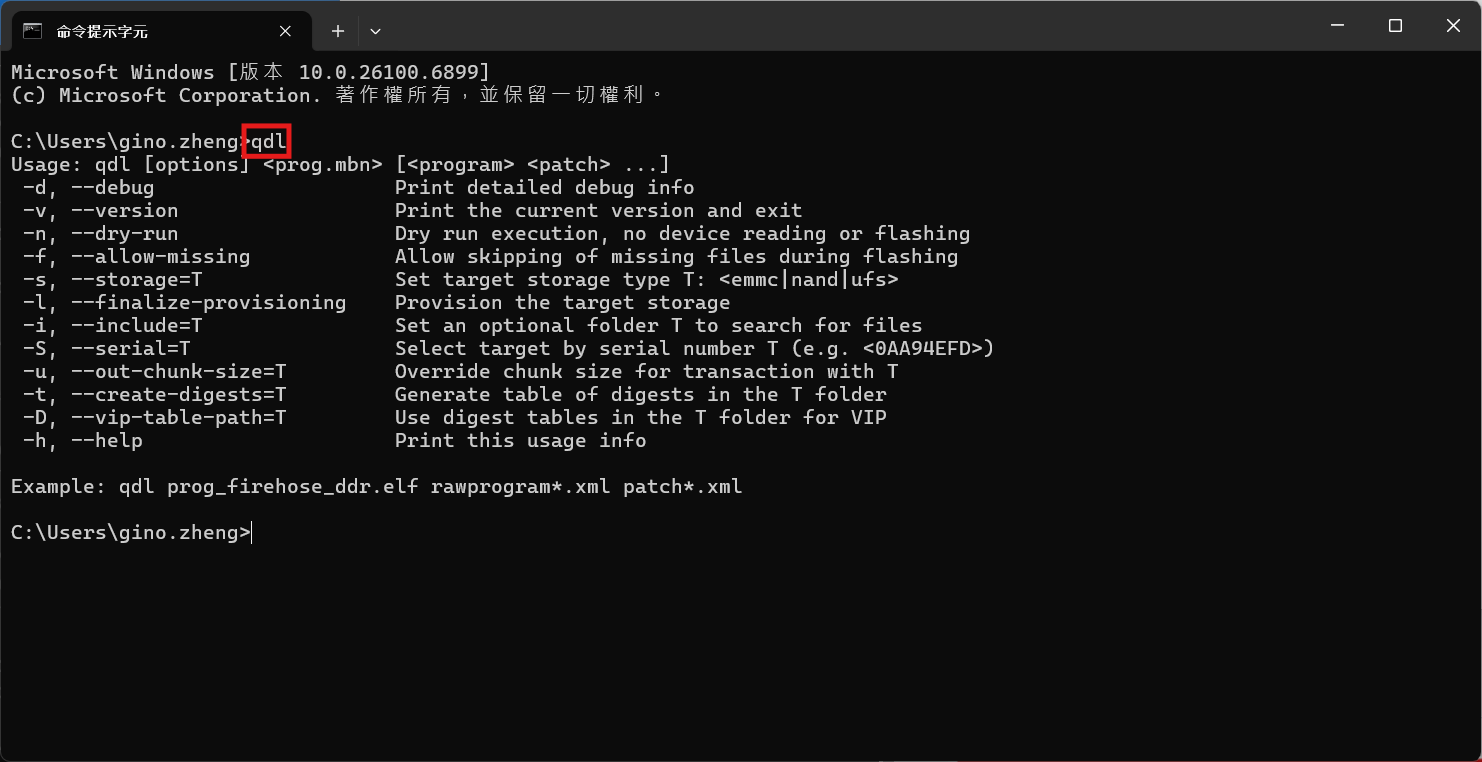
- Type qdl and you can see the QDL usage now!!
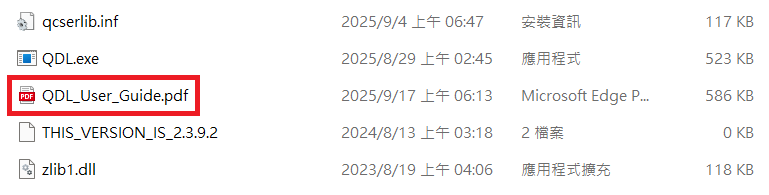
You can see the QDL_User_Guide.pdf for more details
winUSB Installation Guide
- Let board enter EDL mode
Please check Device Guides for more details
-
Connect the EDL USB port to PC
-
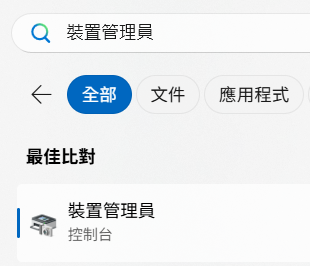
Search device manager (裝置管�???
-
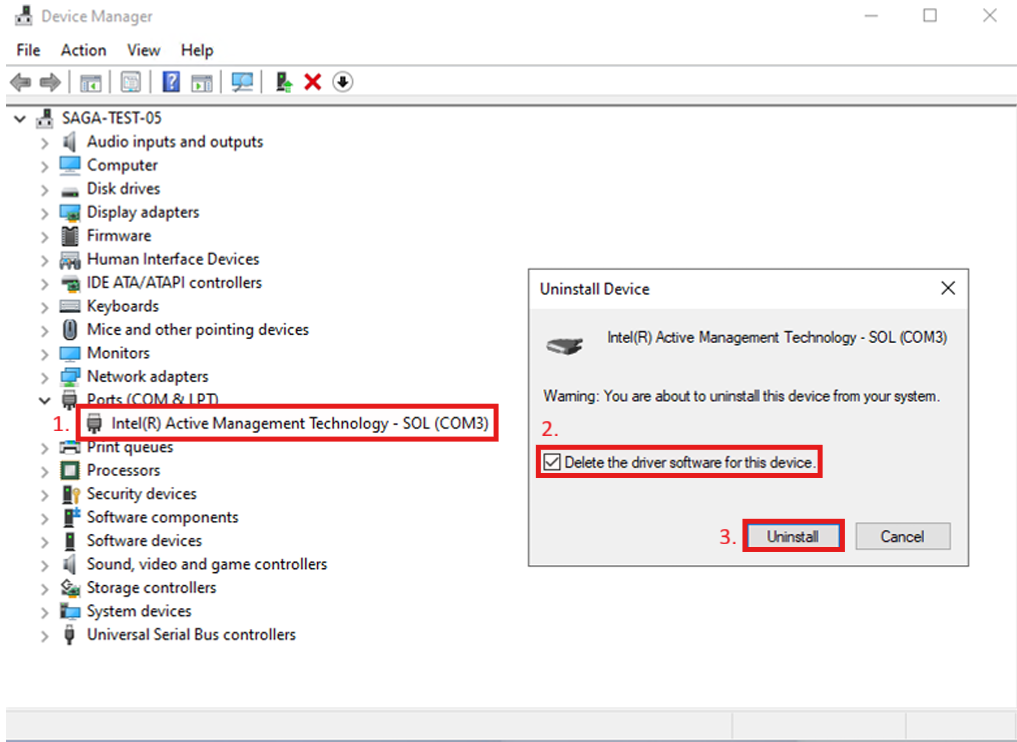
Uninstall other drivers for the device
-
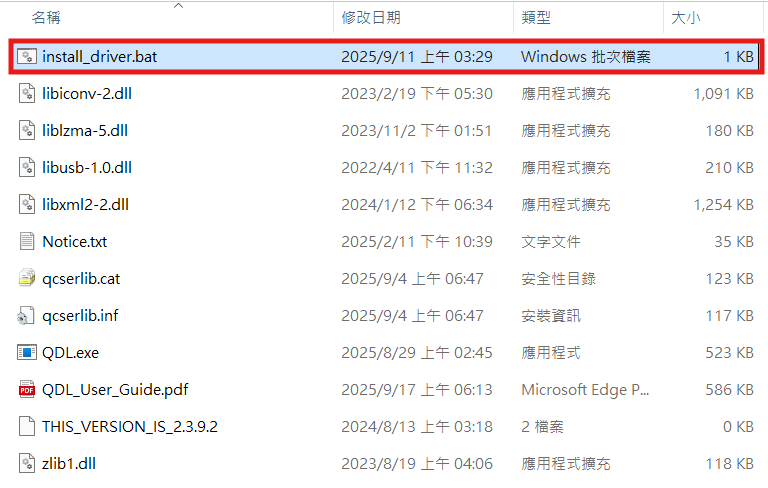
Open install_driver.bat in QDL path to install winUSB driver
-
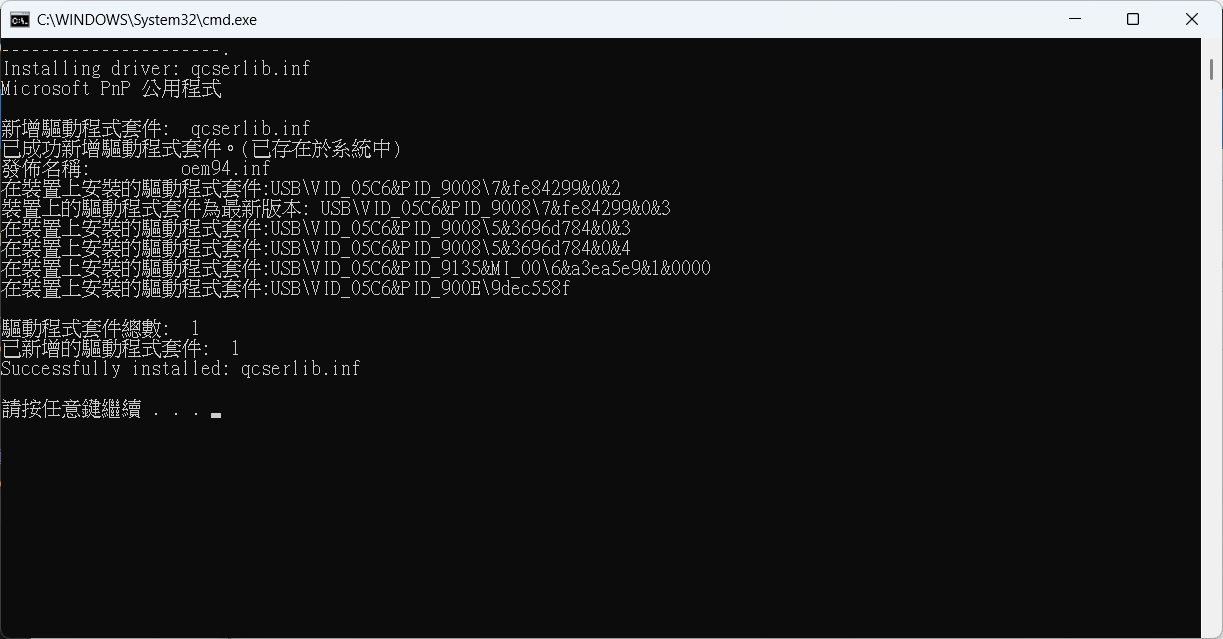
Press any key to close window
Let device in EDL mode and connect the EDL USB Port to HOST.
Please check Device Guides for more details
Open terminal and enter the image folder:
EX:
cd ${workspace}/build-qcom-robotics-ros2-humble/tmp-glibc/deploy/images/${YOCTO_MACHINE_NAME}/qcom-robotics-full-image
Choosing the platform to flashing image.
QCS6490
QCS6490 Platform Flashing Guide

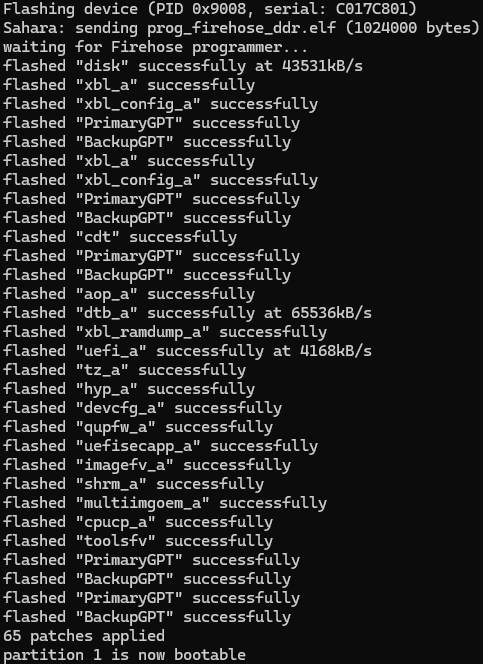
IQ9075
IQ9075 Platform Flashing Guide
UFS
Flash provision (Once only)
qdl prog_firehose_ddr.elf provision_1_2.xml

Flash Safety Island
- Enter sail_nor folder
cd sail_nor
- Flash sail_nor
qdl --storage spinor prog_firehose_ddr.elf rawprogram0.xml patch0.xml

- Back to the root path
cd ..
Flash UFS All Images
qdl prog_firehose_ddr.elf rawprogram*.xml patch*.xml
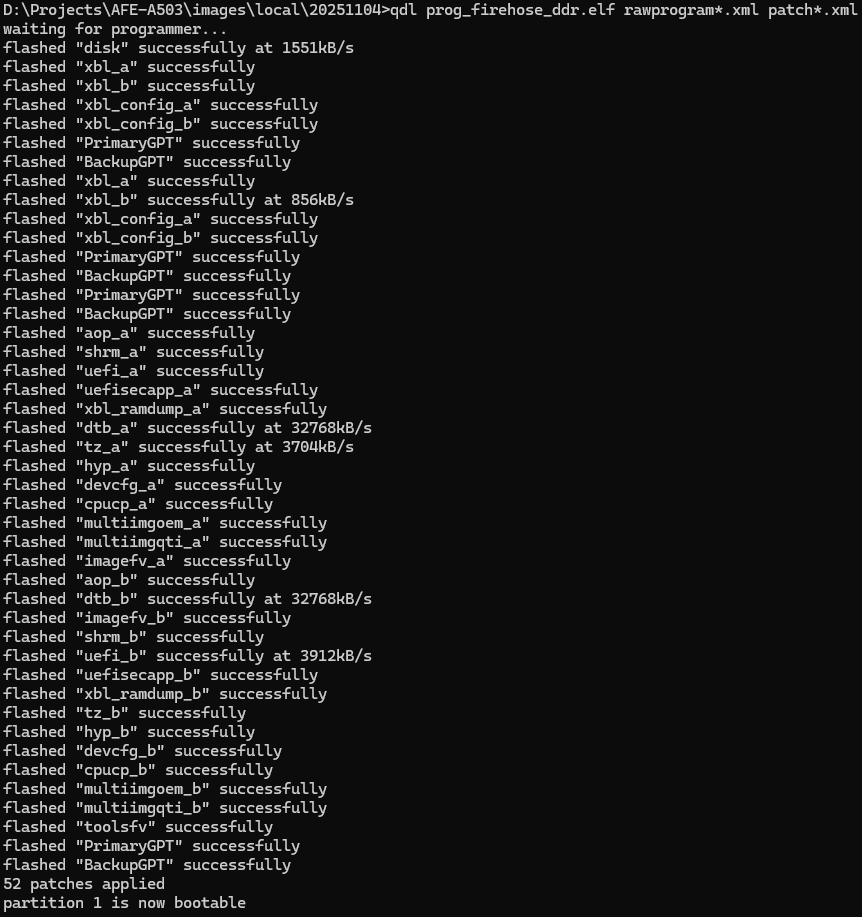
Switch device to Normal Mode and power on device
Customization
Setting up SDK
You can download the sdk from [sdk.qcs6490.le.1.7.tar.gz ]
The size of sdk.qcs6490.le.1.7.tar.gz is 5,670,674,463 byte (5,537,769 KB)
The md5sum of sdk.qcs6490.le.1.7.tar.gz is a40209831076f82feff2103788be6b35
Or perform the following command in terminal console
$ cd build-qcom-robotics-ros2-humble/tmp-glibc/deploy/sdk
$ sudo ./qcom-robotics-ros2-humble-x86_64-qcom-robotics-full-image-armv8-2a-qcs6490aom2721a1-toolchain-2.5.0.sh
Enter new installed directory or just press Enter to use default directory. While Proceed[Y/n]? shows up, please enter the correct one.
Waiting for the SDK installed (while the following messages show up completely)
Setting up cross compiling environment
SDK has been set up (ref.Setting_up_SDK) Perform the following command in terminal console
A example for the ${TOOLCHAIN}: /usr/local/oecore-x86_64
$ source ${TOOLCHAIN}/environment-setup-armv8-2a-qcom-linux